
|

|
|
|
Serenity
|
Date: 9-22-2006
|
Number of Hours: 7.00
|
Manual Reference:
|
Brief Description: HS - rivet frame and skin except rear spar
|
|
Riveted HS asembly - started with right half, then did left half and encorporated full length spar, thus bringing it together into one assembly. The pics show the three main methods for riveting the HS:1) When rivets are not close to an edge and thus not accesible by my preferred method of riveting (pneumatic squeezer), the rivet gun and bucking bar are used. Here you see the flush swivel set, which allows a little tilt and prevents creases in the thin skins. I did manage to put a couple in when the set skidded around - fortunately these were on the lower skin. I changed my technique to watch the set more than the bucking bar, and use my fingers to gauge the forming rivet head by grasping the bar around the bottom. With this, I had no further problems. Note the duct tape (otherwise known as Aircraft Fastening Straps) - helps protect nearby surfaces from the vibrating bar. TIP - I found no marring if I apply rivet tape over the heads. It really doesn't matter much, as markings will be removed later in paint prep.2) Blind rivet tool - Occasionally, one finds no ability to gain access on both sides of a join - thus use of blind rivets. They are popular under the 'Pop rivet' name, though these are another brand. They have nearly the strength of a standard rivet, and there are ones out there that are equal. The rivet is squeezed by a central pin the size of a small finishing nail that is pulled by the riveter - when fully squeezed the pin breaks off at the rivet head. 3) My favorite - the pneumatic squeezer in action doing skin to rear spar rivets. Easy!
|
|
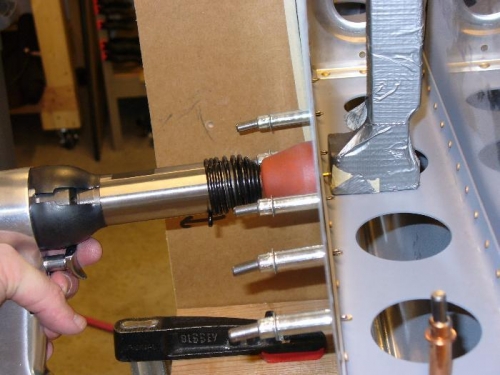
Rivet gun and my favorite bucking bar.
|
|
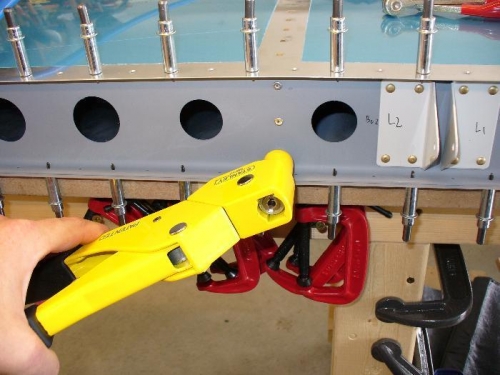
Stanley blind (pop) rivet tool
|
|
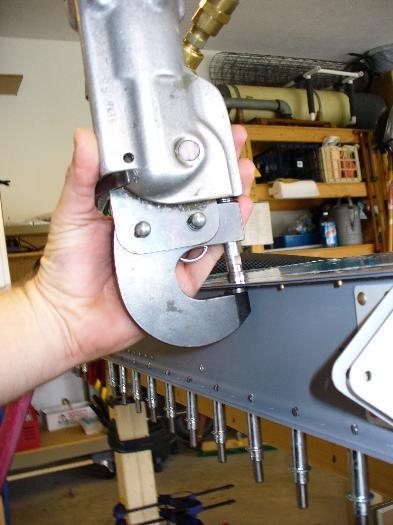
Pneumatic squeezer
|
|
|
|
|
|
|
|
|
Copyright © 2001-2024 Matronics. All Rights Reserved.
|