Brief Description: Building and mounting the battery box
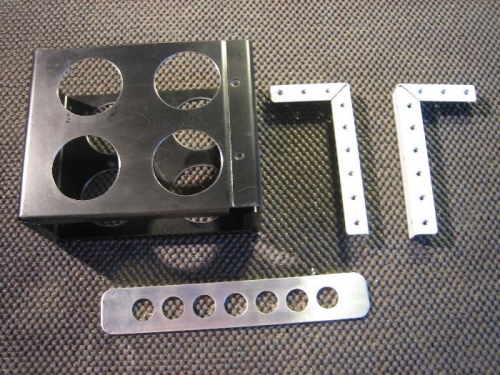
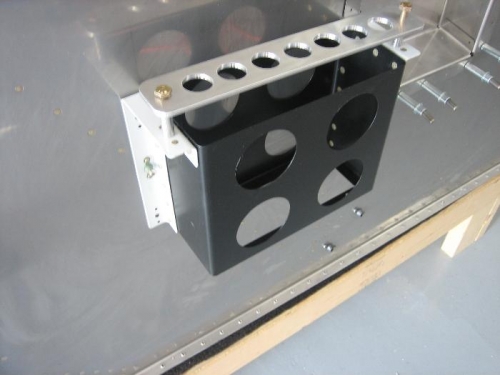
I worked on the battery box today. I figured that pretty soon I will need some power to test systems and having a 12Volt battery is the best way to do it. I decided to take the challenge and drill the optional lightening holes in the steel box. These are 2 inch holes, so the only tool choice in my mind is the hole saw. You could use a fly cutter if you are a masochist, but a good quality hole saw made to cut steel is the best way to get it done in my mind. The trick is using Boe-lube liberally and taking your time. I cut the holes in less than 30 minutes and with a little care it will turn out great. I touched the hole up with a sanding drum in my die grinder and then used a 1” Scotch-Brite wheel. After a cleanup with MEK, I gave the box a couple of good heavy coats of Satin Black Rust-Oleum. The aluminum hold down bar is made from 1/8“ bar stock per the plans and I cut the lightening holes with a Step drill at ¾”. I then added the nut plates to the mounting angles that mount the unit to the firewall. The assembly is then riveted together with AN4264-4 rivets and bolted to the firewall with AN3 bolts. I also made up two 7/8” spacers required for spacing the hold down strap across the top of the battery. The unit is done and as soon as I permanently install the firewall recess, the will bolt the unit in for good. I liked the way it turned out, it is very light and very strong.