
|

|
|
|
Buck's RV-8
|
Date: 9-5-2008
|
Number of Hours: 5.10
|
Manual Reference:
|
Brief Description: Battery box modifications and installation
|
|
After a lot of on-the-spot engineering and discussion with various people, I decided to mount the battery box on its side instead of facing up. This will make it easier to replace the battery, and the Odysseys don't care which way they're mounted. I put the fuselage on its floor rack and removed the rotisserie attachment, then temporarily fitted the engine mount with scrap bolts, just to get an idea of clearance issues with the battery box.
Other builders have mentioned that you have to be careful that you don't mount the box too far outboard, causing interference problems between the battery and the firewall flange or cowl hinge. I got around that by angling the opening of the battery box 6 degrees away from the firewall. (Great suggestion, Jim!) I fabricated new upper and lower attach angles, back-drilled them to the existing holes in the box, then cut off the "top" leg of the existing powder-coated angles so they can be re-used for their intended purpose -- to hold the battery in place.
The upper three AN3 attach bolts go through the baggage compartment floor support angle, and I fabricated a second, lower angle which will be riveted to the firewall.
A great benefit of this design is that I'll still be able to bolt stuff on the back side of the firewall abeam where the battery is, because there's room behind the battery mount for bolt heads!
|
|
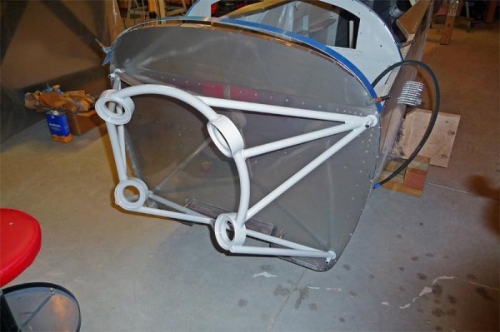
Engine mount temporarily attached.
|
|
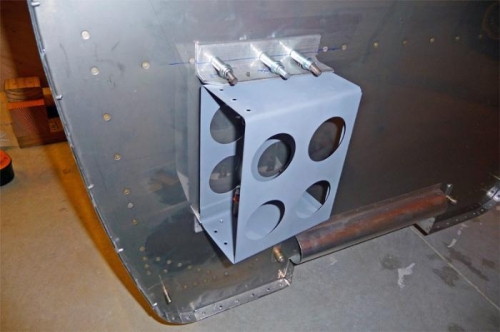
The Odyssey battery box clecoed in position.
|
|
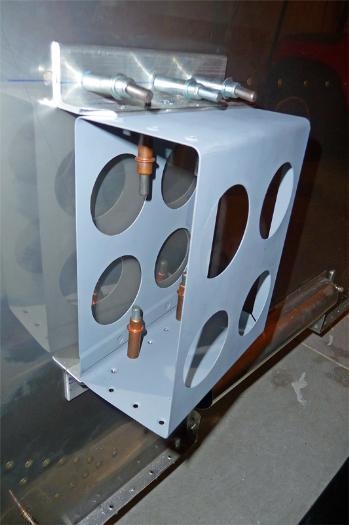
A closeup, showing the 6 degree angle of the battery box.
|
|
|
|
|
|
|
|
|
Copyright © 2001-2024 Matronics. All Rights Reserved.
|