
|

|
|
|
Buck's RV-8
|
Date: 9-21-2007
|
Number of Hours: 4.50
|
Manual Reference:
|
Brief Description: Work floorboards, ELT mount
|
|
I bought a nice 2'x4' piece of birch and cut it to fit the aft fuselage, way back where the static ports, ELT, strobe power unit, and the Grand Rapids magnetometer will be.
After fitting the floor, I laid in the fuselage for a while and figured out the final location for the ELT and strobe unit. I originally wanted to mount them directly behind the lower aft wall of the baggage compartment, but there were complications with pre-existing platenuts on the longerons. Now, I'm going to mount them one fuselage "bay" aft of the baggage compartment. This being an RV-8, adding some weight aft is OK. [Note: The strobe power pack was eventually moved one bay forward.]
I measured vertically between the longerons at two locations, 6" apart, and got to work. I made the mounting plate out of 0.040 sheet, and fabricated the angles that will attach it to the longeons at the top and bottom of the plate. I'll use platenuts to fasten the whole thing, just so I can remove it for modifications later (like when the new 406 MHz ELTs come out, inevitably in a different form-factor than this one.)
The ELT bracket will be riveted to the plate. On the back of the plate, I'll rivet on a vertical stiffener, just for fun. Also, I made a spacer shim out of 0.063 stock. This spacer will go under the bracket (see photo) to give the bracket more stability. (I've never liked how these ELT mounts are designed to sort of "balance" on the metal strap that goes underneath the bracket. The spacer will fix that.) I drilled, clecoed, deburred and primed all the parts except the two attach angles. Those still have to be drilled to the longeons.
|
|
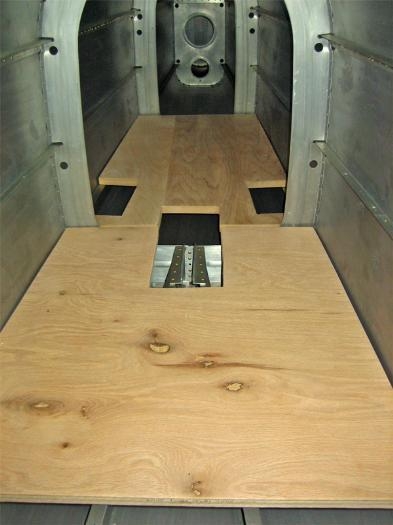
Now the wooden work-floor goes wa-a-a-a-y back there.
|
|
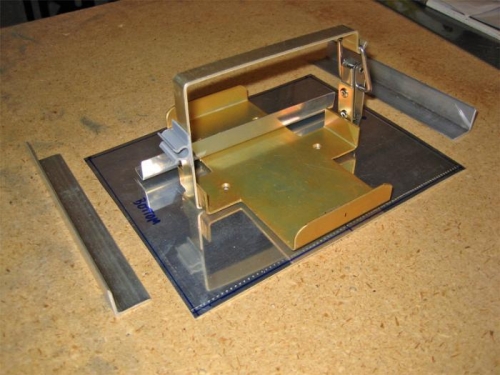
The major components of the ELT mount.
|
|
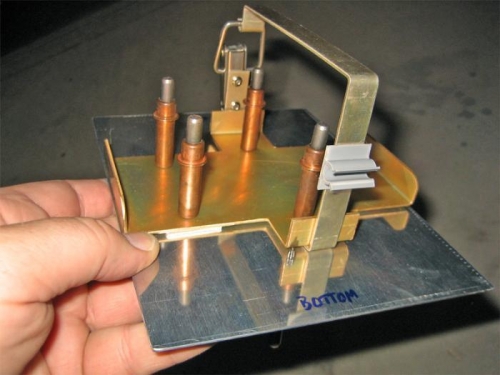
My thumb is pointing to the spacer under the bracket.
|
|
|
|
|
|
|
|
|
Copyright © 2001-2024 Matronics. All Rights Reserved.
|