Brief Description: Cockpit side console; cockpit paint tests
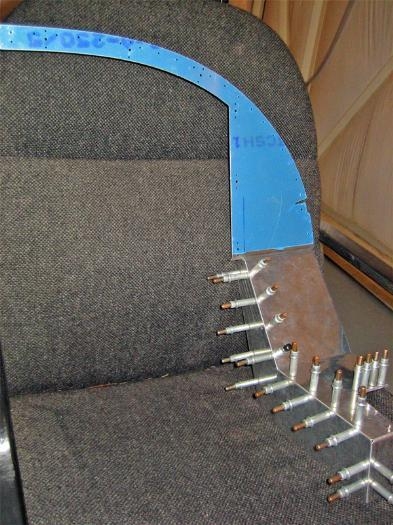
Since I'm still waiting for a couple of parts for my wings, I moved over to the fuselage today, and began the process of mounting of my custom right-side console to the fuselage.
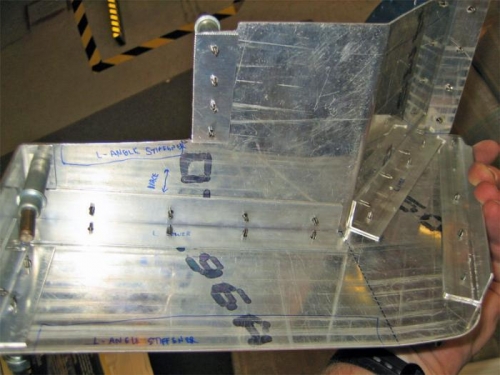
The panel will be attached in the following locations: 1). Four screws through the lower lip of the right side panel, and 2). At least four screws through two aluminum angles on the vertical channel caps.
All of the mounting screws will be held with platenuts, and I'm engineering everything so the console can be removed easily if I ever need to replace a switch someday.
I began engineering the whole thing by drilling the four under-panel holes and getting them prepped and countersunk for platenuts. Then I fitted some of the attach angles and understructure that will support the console and give it a lot of strength. I'd still like to come up with a way to fasten everything to the original attach angle that's riveted to the skin below. I'll work on that soon.
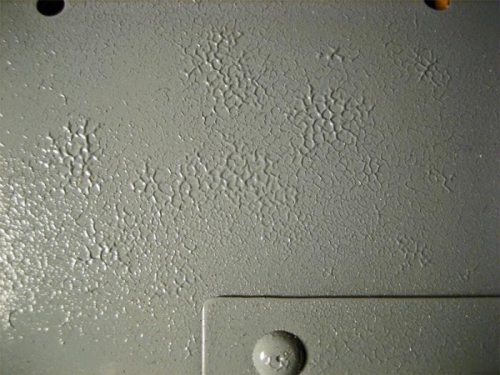
Finally today, I stripped several parts of the throttle quadrant that I test-painted yesterday. The clear coat I sprayed caused them to bubble in a strange way, so back to the drawing board. I sanded and re-painted them. No clear coat this time.
I added more bracing and attach points for the console.
The console is held to the right side panel with four screws and platenuts.
The paint on the throttle quadrant components bubbled when I sprayed the clearcoat -- no idea why.