
|

|
|
|
Buck's RV-8
|
Date: 10-28-2007
|
Number of Hours: 5.10
|
Manual Reference:
|
Brief Description: Flap shaft cover; elev. pushrod & bellcrank mount
|
|
I began the afternoon by attaching a new M3414M rod end to the forward elevator pushrod. (The original rad end appeared to be slightly bent, so I ordered a replacement, which arrived yesterday.) I adjusted the pushrod to the required length of 30-1/8". All the pushrods are now complete.
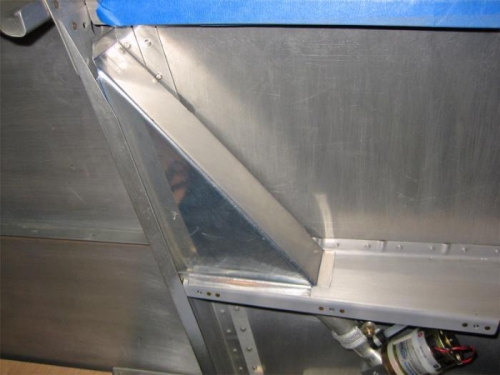
Next, I finished riveting the elevator bellcrank mounts to the fuselgage structure, using four LP4-4 blind rivets in the four locations I could not reach earlier with either a squeezer or a bucking bar.
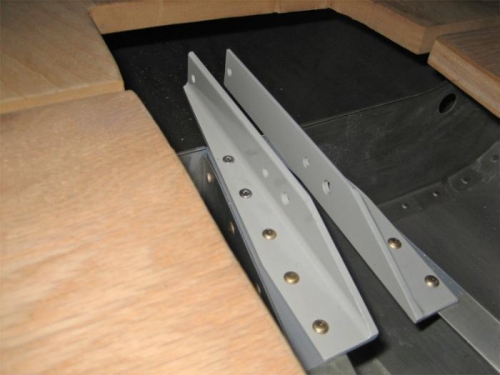
The final project today was the main event: I designed and built a custom, removable cover for the flap motor shaft, where it protrudes through the left armrest in the back seat. I think this will prevent any issues with a backseater getting their sleeve caught in the actuator, or somehow FOD-ing the actuator inadvertently.
I started by fitting, folding, and cutting a piece of graph paper into the approximate shape I would need, then I transferred the design to a piece of thick posterboard for final tweaking. I had to make two posterboard prototypes before I got the bends and attaching tabs right. Then I transfered the design to 0.032" aluminum, cut it out, filed and sanded the edges, then bent it into the final shape. In order to make some of the bends, I created a homemade bending brake out of a steel back-riveting plate, a steel ruler, some heavy-duty clamps, and lots of manual labor. It worked great.
|
|
Elevator belllcrank attach-angles, finally secured with all ten rivets.
|
|

A posterboard template helps perfect the shape of the flap shaft cover.
|
|
The final product, in its rough form. It will be attached with 3 or 4 screws.
|
|
|
|
|
|
|
|
|
Copyright © 2001-2024 Matronics. All Rights Reserved.
|