
|

|
|
|
Buck's RV-8
|
Date: 8-20-2007
|
Number of Hours: 3.30
|
Manual Reference:
|
Brief Description: Landing light
|
|
Mounted the ballast unit to the mounting plate using three screws, washers and stopnuts. Added an Adel clamp on one corner to hold the bulb power wire.
Installed the two platenuts on the main mounting plate which will attach the bulb assembly.
Cut the Plexiglas lens with the bandsaw (within about 1/8" of the cut-line), trimmed it to final size with a stone grinding wheel in the bench grinder, and sanded the edges with 400-grit sandpaper. (I'm still amazed at how well this technique works on what initially appears to be a pretty fragile medium.)
Fashioned a strapping tape handle (actually two of them) in accordance with the Duckworks instructions, then fit the lens to the wing and drilled the six mounting holes in the lens and skin. (Used a #40 bit at slow speed first, then a 1/8" Plexiglas bit. Opened up the lens holes to 5/32" with a Plexiglas drill bit and countersunk them. Deburred the six holes in the wing skin, cleaned up the inside of the wing, and masked & painted the bay with high-temperature white enamel.
Countersunk the platenut mounting holes on the lens strips, then cleaned, primed and painted them.
|
|
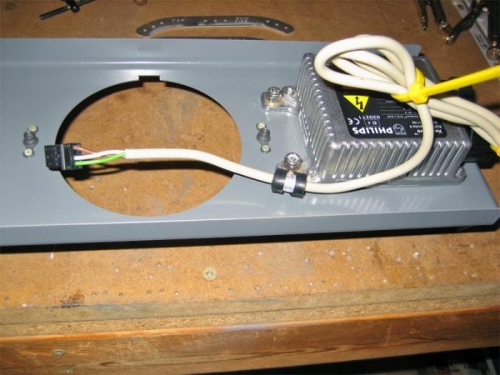
Power unit mounted on the mounting plate. I'll clean up the wires later.
|
|
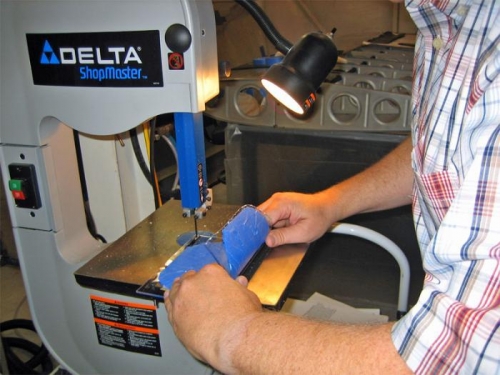
Cutting the Plexiglas lens with a bandsaw. You've heard of the hot knife and butter thing?
|
|

Landing light bay, painted white to throw more photons!
|
|
|
|
|
|
|
|
|
Copyright © 2001-2024 Matronics. All Rights Reserved.
|