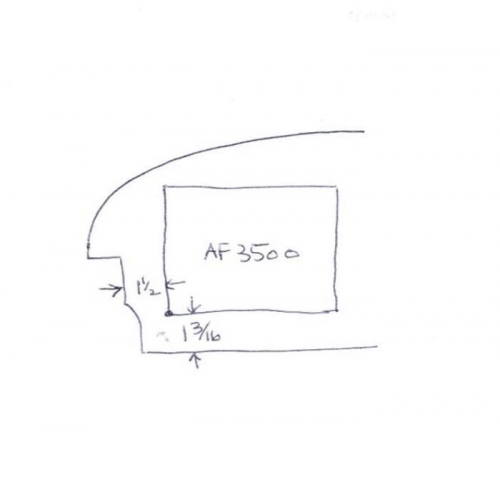
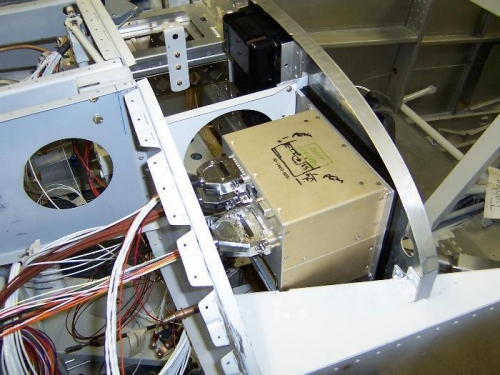
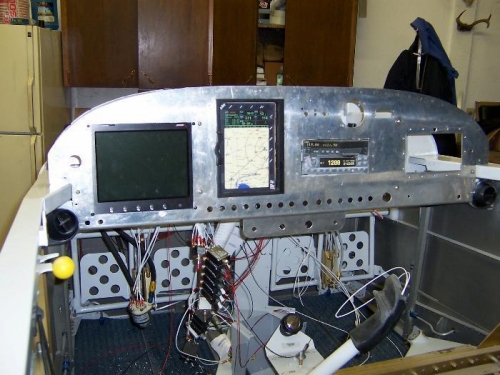
This is a follow-up on the installation of the AF3500 in a stock RV9A panel (with the tip-up canopy). The first picture shows the lower left corner position we used to mount the AF3500. We had room below the AF3500 for the pilots headset jacks (although this may not be the optimum location for these jacks). The second picture shows the AF3500 box mounted in the panel. You can see the small cutout we needed to make in the F-721A to allow the AF3500 to fit. If you moved the position of the AF3500 slightly to the right you wouldn't need to make this notch, but would have to make a larger offset to the F-745 rib. In this picture you can also see the cutout to the F-745 rib that we made to allow the AF3500 to fit. We cut off the rib behind the AF3500 then made an offset with an 3/16 inch bar (with lightening holes) and a new rib end. These were riveted to the original rib and new screw holes were made in the stock panel. Finally, the cable assemblies were installed through the forward cabin rib to insure they would fit properly. The last picture is a shot of the AF3500 in our panel as will be seen by the pilto. The switches normally in front of the pilot were moved to the center of the aircraft to allow the AF3500 to fit into the panel. In retrospect this was a good move as it better positions the switches in the panel.