
|

|
|
|
Todd's Web site
|
Date: 1-27-2008
|
Number of Hours: 3.00
|
Manual Reference:
|
Brief Description: Left Wing #34 - inspection panels & aileron
|
|
Drilled dimpled and installed the nutplates for the three underwing inspection panels.
Hung the aileron in place and began to look at all the hardware that was needed to hang it.
When I installed the outboard aileron bracket, I noticed that it was canted inboard a few degrees, but didn't think much about it at the time. Well, once I had the flap in place, I realized how much of a problem it is. After perusing the forums, I learned this is a common problem area, and it's caused by drilling the side holes in the rib while the bracket it held in with cleckos. The right way to do it, is to rivet the bracket to the rear spar, THEN drill the holes in the side rib and rivet...sure wish the instructions had pointed that out!
Anyway, the design allows for some flexibility there. There is supposed to be 2 washer either side of the bearing, but if you notice in the pic below I have 1 on one side and 3 on the other. This is allowable as long as you can get the proper hardware in the proper sequence on the inboard bracket without it all binding. Unfortunately, that isn't the case for me...I'll have to "persuade" the arm of the outboard bracket a little more outboard to satisfy me.
|
|
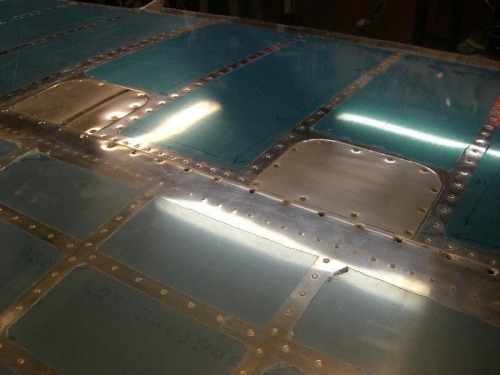
Inspection panels installed
|
|

Hanging the aileron
|
|
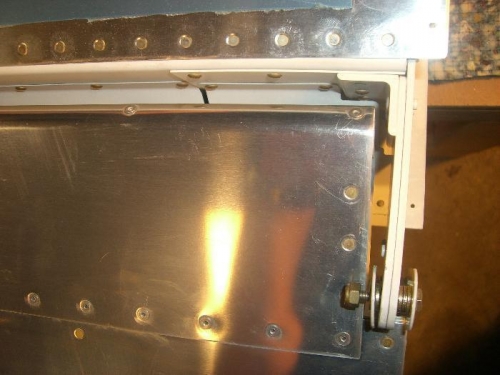
You can see how the arm is canted inboard a few degrees
|
|
|
|
|
|
|
|
|
Copyright © 2001-2024 Matronics. All Rights Reserved.
|