
|
|
Sid & Houston Mayeux Project
|
Date: 2-26-2014
|
Number of Hours: 4.00
|
Manual Reference: SB 14-01-31
|
Brief Description: SB 14-01-31 part 7, match-drilling and riveting th
|
|
Once I knew the flange angles were bent correctly, I re-clamped them into place at the spar/rib junction, C-clamped FIRMLY into place, then match-drilled the flange angle through the existing forward spar and main rib rivet holes, clecoing every hole.
Image 2: Disassemble, debur, prime, then rivet the rib flanges to the ribs.
Image 3: I then cleco'd the forward and main ribs back into places, riveted the ribs to the forward and aft spars, then riveted all the skins and nut plates...the stabilizer is reassembled.
I love the fact that this assembly came right back together. Everything fit, just as it did before. Also, the doubler plates give a clear sign of added strength to the forward spar.
|
|
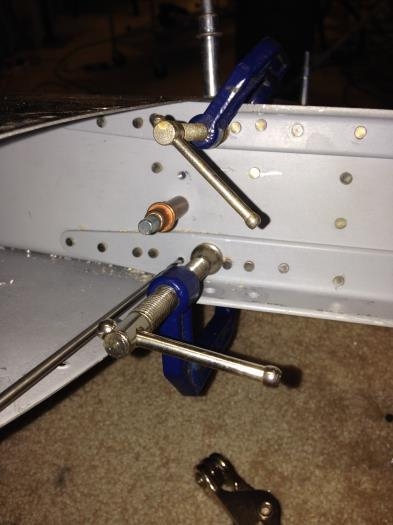
Match-drilling the main rib flanges
|
|
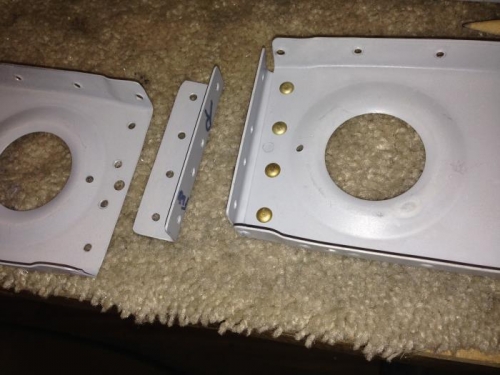
Main rib/flanges: Drilled, primed, assembly
|
|
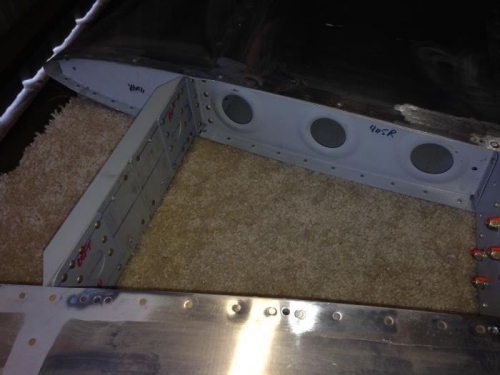
Ribs/skins/spars riveted -- she is back together.
|
|
|
|
|
|
|
|
|
Copyright © 2001-2024 Matronics. All Rights Reserved.
|