
|

|
|
|
Peters Web Site
|
Date: 1-21-2018
|
Number of Hours: 3.00
|
Manual Reference: 9225501-LOG-05.024
|
Brief Description: 2: Underfloor Wiring Duct
|
|
As soon as the steps are riveted in place (a job for next weekend) then the next task will be to rivet the floor panels down. Before I do this however I want to give myself some options with regard to underfloor wiring ducts. I plan on installing as many electrical bells-and-whisltes as my bank balance will allow, and I'm led to believe that the wire ways made available in the standard kit will be a bit of a squeeze, having not been designed for the modern day avionics and gizmos available today.
Following the templates that I stuck in place yesterday, I drilled a couple 3/4" holes in the main spar. I also drilled similar holes in a couple of the floor bulkhead sections so that I could install rigid, light duty, conduit all the way from the spar to the tail section.
This worked well, except for the fact that I forgot about a couple things.
1: My conduit runs were above seat floor height, so I had to get my heat gun out and form some dog-leg bends to get them down lower.
2: I forgot about the lower control linkage that connects the two control sticks. With this in place the control linkage fouled on my conduits when moved fully left or right. This would not do, so again, I got my heat gun out and put a sharp goose-neck bend in the conduit so it would clear the control linkage.
All good now, thanks to dog-legs and goosenecks :-).
|
|
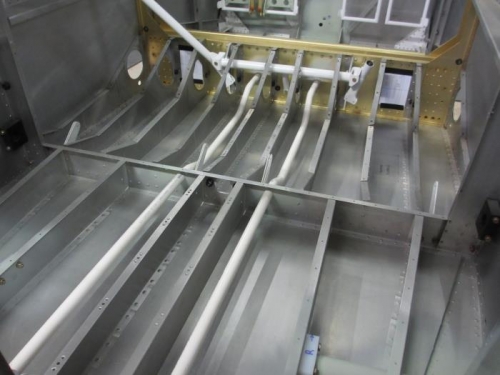
Two conduits running from the main spar, all the way back to behind the baggage compartment
|
|
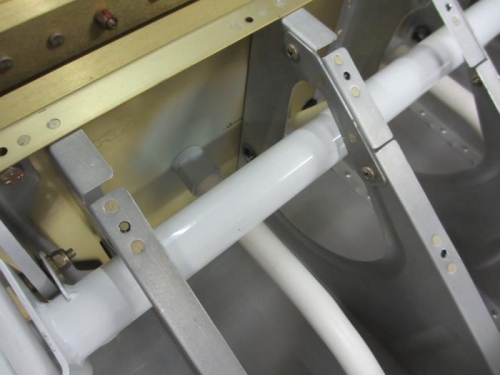
A threaded fitting secures the conduit to the main spar
|
|
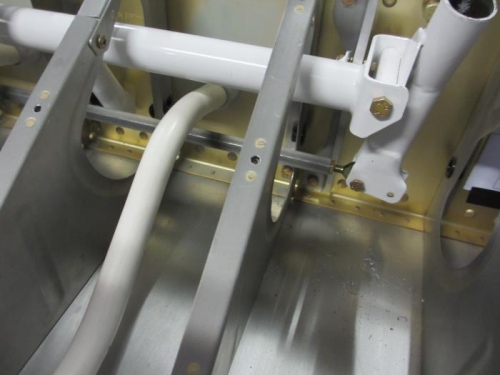
Had to put an extra gooseneck bend in the end of the conduit so it would clear the lower control rod
|
|
|
|
|
|
|
|
|
Copyright © 2001-2024 Matronics. All Rights Reserved.
|