
|

|
|
|
Peters Web Site
|
Date: 11-17-2019
|
Number of Hours: 4.00
|
Manual Reference: 9225501-LOG-04.044
|
Brief Description: 1: Right Wing Tip
|
|
I continued on with the right wing tip this morning, and rivetted in place the rib that I prepared yesterday. All good.
Next I prepared the second, transverse, rib that fits inside the wing tip to help maintain its shape. I fluted the flanges to get the rib nice and straight, then adjusted the flange angles to match the wing tip shape. With the rib inside the wing tip and positioned about where it felt it should be, I then put my LED torch inside. This allowed me to mark the rib position on the outside surface. It was then a simple matter of match drilling holes as per the drawings.
With holes all drilled and deburred I alodined and primed the transverse rib, before then setting it in place with resin (mixed with flock). I'll rivet it in place tomorrow, when the resin has fully hardened. Apparently if you don't do this then you run the risk of a wavy surface where the rivets pull in tight.
No pictures, but I also spent some time bolting down the canopy roll bar. A few choice words were used while trying to do the impossible here. There's a spacer that needs to go under the bolt heads, and the Vans designers couldn't have made it any more difficult to get to if they tried. In the end I had to leave it. I'll come back to this another day, when I'm feeling lucky!
|
|
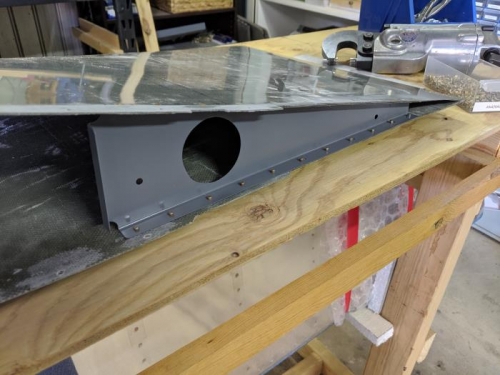
The first wing tip rib, rivetted in place
|
|
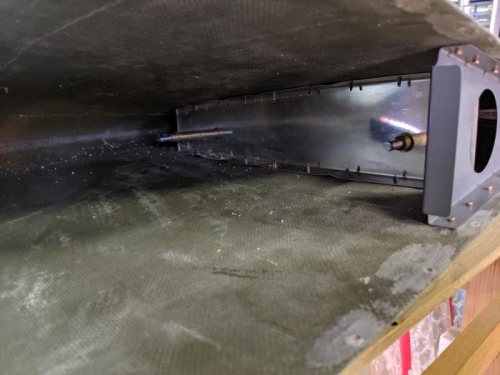
Match drilling the second wing tip rib
|
|
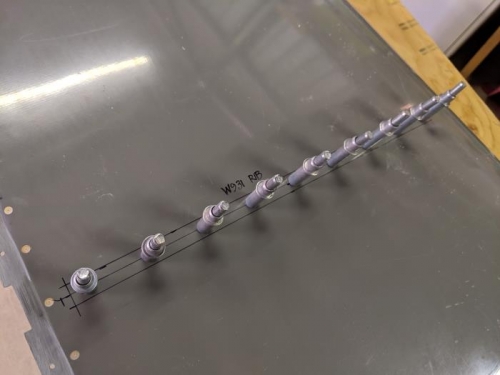
After alodining and priming, I then glued the second rib in place with resin, to be rivetted tomorrow
|
|
|
|
|
|
|
|
|
Copyright © 2001-2024 Matronics. All Rights Reserved.
|