Brief Description: 1: Right Wing Aileron Control Rods
Was a big day today. First up I spent a couple hours doing some volunteer work with Rotary at the Cancer Council Golf Day, then some housework, before finally getting back to my aeroplane build (having been away for the last two weeks). I didn't leave the shed until 9:30pm.
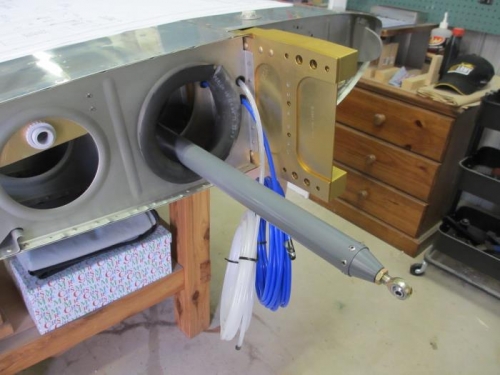
Today I got the right wing aileron connected and set up, which is awesome. Before connecting the aileron control rod I ducked over to the local hardware store and found myself some foam tubing. I cut a short piece, put a slit in it, and used it to line the inboard wing rib lightening hole. I did this to prevent damage to the paintwork on the control rod.
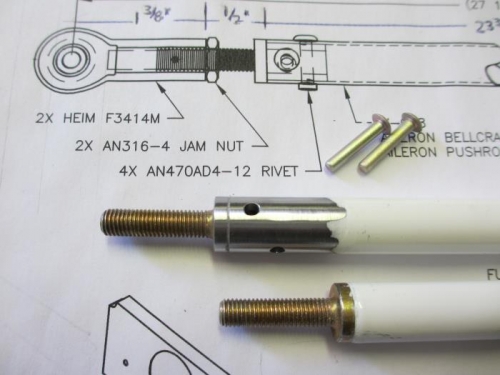
After connecting the main control rod I then set about making up the two shorter control arms. I cut the single piece of supplied steel rod into two lengths, cleaned up the ends and then primed the inside. I did this by mixing up a small amount of primer and sloshing it around inside the pipe. After the primer had dried off a bit I then inserted the rod ends and riveted them in place.
I decided to strip back the original paint near the rod ends to make it easier to mark, centre punch, and drill the holes for the rivets. Once I was done I then repainted the ends with a white gloss primer. Good as new.
I lined the inboard wing rib lightening hole with foam to prevent damage to the aileron control rod
Preparing the aileron control arm ends for riveting
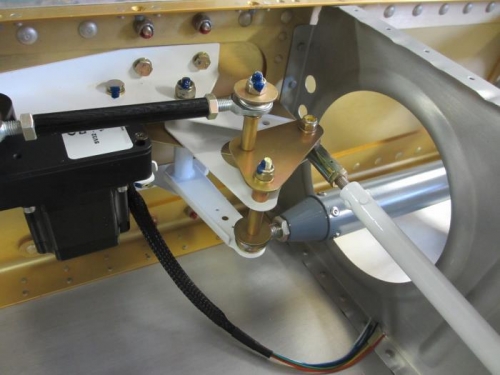
The right wing aileron control rods attached to the bellcrank