Brief Description: More progress on the seat rib subassembly
Most of today was dedicated to yard work but I did find a little shop time in the evening. I still haven't completed the seat rib subassembly but I need some of Connie's time to complete the riveting.
While waiting for some help, however, I did accomplish some prerequisite tasks. The dimpling and deburring of the bottom skins was completed and I primed the strips where the flanges of the seat ribs will mate (the plastic was removed in these areas earlier). I plan to keep priming to a minimum but think it makes sense to coat areas where moisture might accumulate. Inside the bottom surfaces (between the rib flanges and skin) seems a likely place for some extra protection.
The next step was to cleco the bottom skins to the skeleton and check the fit, particularly along the lap joint. The lap joint looked good so it was on to smoothing the skin edges at the forward end of the skins where the left and right sheets form a butt joint. Again, the fit looked good.
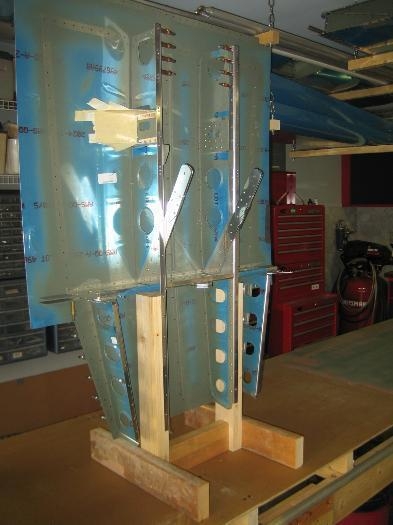
While considering how the riveting might be accomplished, I decided that a simple jig/stand would be useful in holding the structure steady. In my short experience, I have found that riveting is much easier when the work piece is held securely and cannot shift or move. One slip of the rivet gun or bucking bar and you have the potential smiley face or marred skin. Anyway, I quickly built a simple stand from scrap 2x4 lumber that holds the assembly vertical much like the wing jig.
Well, that's it for now. As soon as Connie is available, we will set the rivets attaching the skins to the seat ribs.