
|

|
|
|
DONALD'S WEB SITE
|
Date: 4-24-2011
|
Number of Hours: 8.00
|
Manual Reference: SNX-F21
|
Brief Description: Aft Fuselage Squaring / Crosstie Attachment
|
|
I spent a LOT of time squaring the fuselage so that the crossties could be attached.
I put in the crosstie box at the forward end of the fuselage, and found that it made the front end slightly larger than the 40" wide specified in plans. I anticipated this, since others had the same problem. The splice plates add about 1/4", so it's necessary to trim some material away from where the splice plates sit in order to get the width correct. Once this was done, everything fit very nicely.
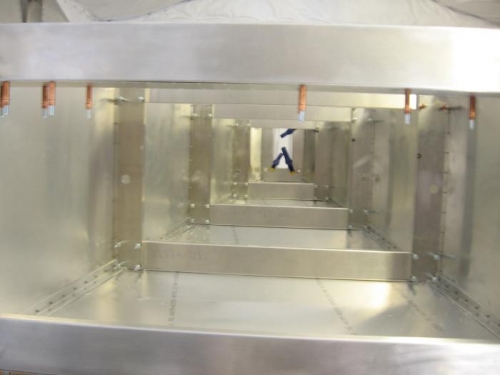
Once the crosstie box was fitted, the squaring began. I used the procedure published by Eric Witherspoon on the Sonextalk Yahoo Group to give what I was doing some structure. 2x4 beams were placed under the lower skin at each lower crosstie to keep the skin from sagging and affecting the alignment.
I squared at each crosstie location, on each side. I then started over, and went through this working front to back, then back to front, then middle to each end. Eventually I got an alignment I was happy with at each station. I used two squares, clamped together when needed for extra length. Because the tailcone was not level front to back, the levels needed to be rotated forward to be parallel to the vertical rivet lines in order to get a true level.
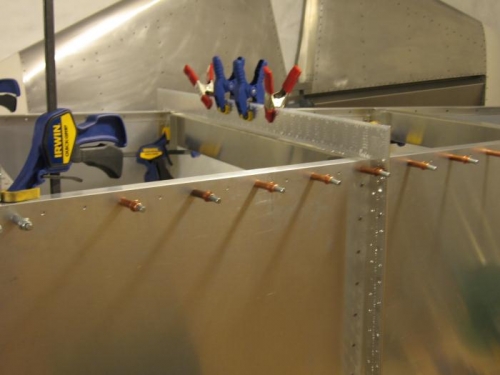
Once everything was square, I put two diagonally-opposed clecos in each side at each upper crosstie to hold the position, then went back through and added additional clecos. I then attached the lower crossties with four, making sure they were centered and flush with the lower skin. I made sure that the aft end maintained the specified 2.5" width as I worked.
|
|
Squaring
|
|
Lower Crossties attached
|
|
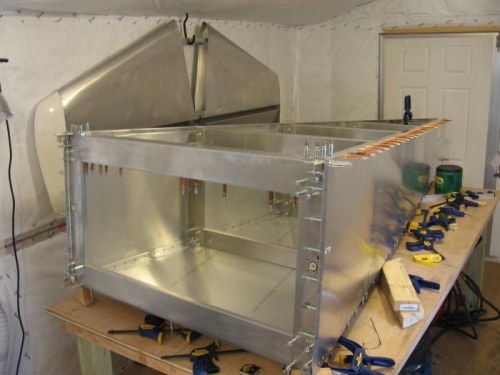
Tailcone Squared
|
|
|
|
|
|
|
|
|
Copyright © 2001-2024 Matronics. All Rights Reserved.
|