When I order the fuselage kit I deleted the tailwheel since I planned to use an upgraded on from JD air. What I didn’t realize was that the tailwheel spring was deleted from the kit too. When I realized that I ordered a spring, but it came undrilled, so I had to drill it to match the spring housing and the tailwheel
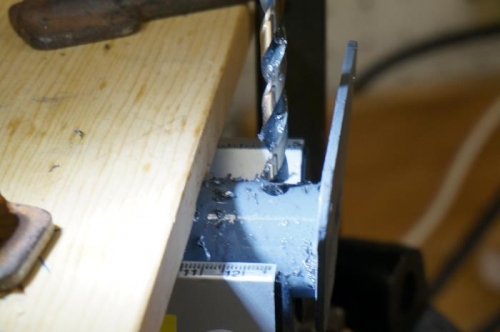
Drilled the tailwheel spring and mount in steps up to "D" size. Then reamed it to ¼ inch.
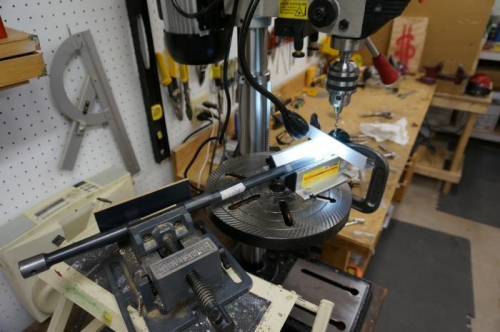
Reinstalled the mount in the tailcone and installed the tailwheel spring. Used the laser level to align the tailwheel assembly so that it is plumb. Drew index marks on the tailwheel spring and tailwheel fork housing. Disassembled the tailwheel and clamped the tailwheel fork in the drill guide using a 3/16" drill bit in the drill press to locate the correct position.
Installed the tailwheel spring and lined it up with the index marks and used the drill press vice to hold it in place. Drilled the aft hole through the tailwheel housing and the tailwheel spring. Removed the assembly, installed a bolt in the hole I just drilled and set it up again for drilling through the forward hole.
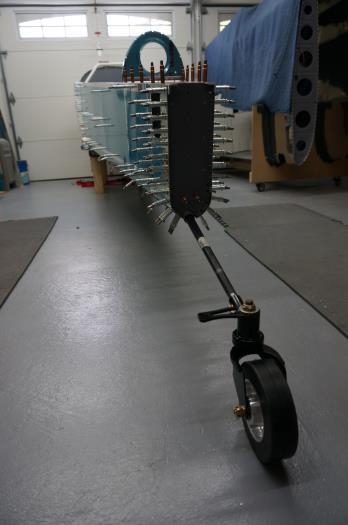
Removed everything from the drill press, cleaned it up, reassembled the tailwheel and installed the tailwheel and spring in the tailwheel mount. Looks good. I couldn't resist raising the nose of the fuselage so that the tailwheel touched the ground.
Drilling the hole for the retainer bolt through the tailwheel spring and mount