|

|
|

|
Hans Marchners Web Site

|
Date: 8-4-2014
|
Number of Hours: 60.00
|
Manual Reference:
|
Brief Description: Painting 1, preparation
|

|
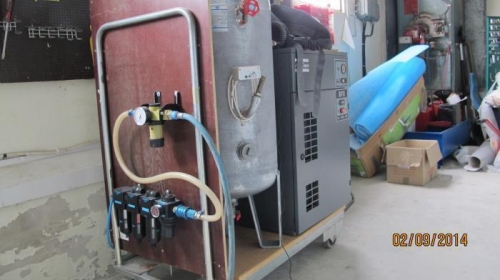
For some reason I decided to paint my project myself. I can remember some of the reasons. No professional aircraft painter in my neibourhood so it would be difficult to transport all the project a long distance and the cost would be considerable. However, the main reason was that I thought it would be simple. Ha! It's not! There is a lot to think of if you haven't done a painting of this size before. You need a BIG space where you can put the parts while they are drying after being painted in a ventilated spraying booth using a large compressor to support the spray gun (professional type) that produces about 300 L/min of air. Skip the cheap spray guns. Added to this there is all the miscellaneous things like cloths, tak rags, cleaning paper and plastic etc for cleaning and to protect from over spray. Not to mention protective gears like gloves, glasses and a good respirator (important particularily if you are using poly uretane paint which liberates highly toxic isocyanate fumes).
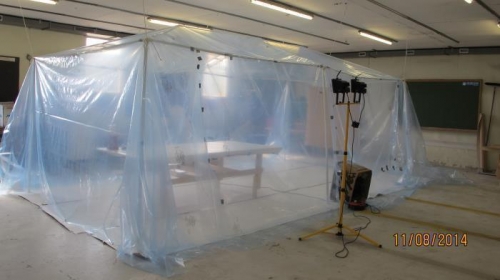
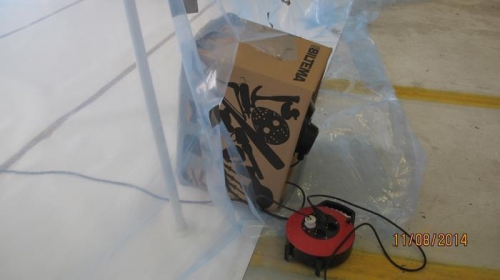
So, I started by hiring a well lighted part of a hangar and built the spray booth basically by covering a 7 x 3 m party tent in thin plastic and added fans and filters to move the air out of the sparying area. Also, hired the air compressor but bought all other stuff. In the middle of the booth I had a table covered with thick paper on which all parts to be painted, on just one side, were placed, Parts to be painted on two sides were placed on trestles to avoid over-spray bouncing from the table and back to the underside of the object. The floor of the booth was covered with thick paper on which water were sprayed every time immediately before painting to try to keep the air free of particles (not completely successful).
|

|

Paint booth
|

|

Fan with filter in cardboard box
|

|

Compressor,100L tank, filters, regulators
|

|
|

|

|

|
|

|

|
Copyright © 2001-2025 Matronics. All Rights Reserved.
|

