Brief Description: Riveting Begins on the HS Rear Spar
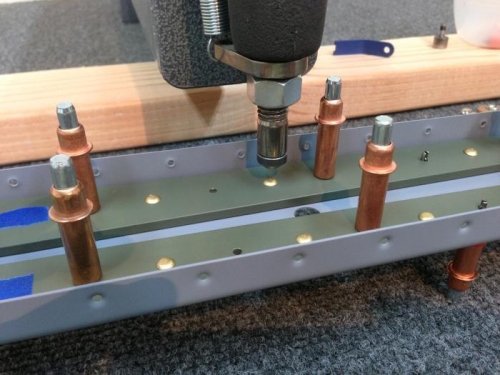
The first step was to assemble the all the parts that make up the rear spar of the Horizontal Stabilizer (HS). They include the two rear spar channels, HS-603PP and the two reinforcement bars, HS-609PP. Starting in the middle and work out, the parts get Clecos in every hole. I place the Clecos on both sides of the spar so that the part would stand up off the table to make it easier to work on.
The construction manual tells you to place tape over the holes to prevent you from accidentally riveting those holes at this time. I thought that I was going to get to use my hand squeezer on this assembly rather than using the rivet gun and bucking bar. After squeezing four AN470AD4 (1/8") rivets my hands were telling me that this direction was not going to happen.
So instead, I decided to try using the DRDT-2 to drive the rivets. This worked out better, but still hard on the arms as these rivets are tough. I set all the remaining rivets this way, checking the shop side with the proper rivet gauge along the way. The gauge is the small blue item on top of the 2x4 in the picture.
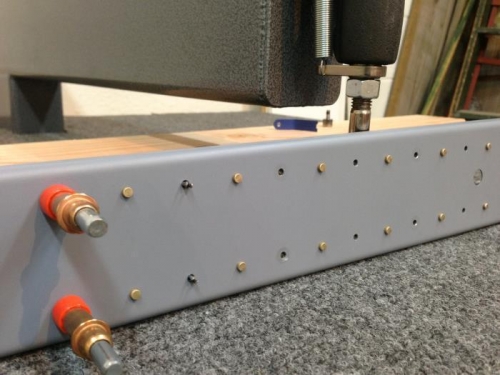
Half way complete, and looking at the "shop" side I was pleased with the results after riveting every other one.
The first step toward a completed rear spar is below. After a closer inspection, I went back with the rivet gun and bucking bar and set the rivets so the gauge moves over the shop side as the DRDT-2 did not get them set to the proper height. There are a few that I over set and have marked them so I can get some feedback from another local builder.