After my frustrating day with the upper cowl yesterday I decided to move to other tasks today. Turned out to be a good idea because I had a very productive day.
The vent ducts were drilled to the panel frame and duct tubing cut to length and installed.
The right rear skirt was cut to rough shape and then drilled to the canopy. Once drilled both left and right skirts were removed. The left skirt was marked for final shape based on rivet holes and then left and righ skirts were matched together and cut to same shape and dimensions, so they will be symmetrical. Skirts were bent and twisted so they would lie flat against the canopy and skins.
The canopy and side skirts were removed. The canopy latch was fitted by shortening the bottom of the latch bushing and trimming the head end of the latch.
The canopy rail was final drilled to the fuselage, holes deburred and countersunk and the rail was attached to the fuselage.
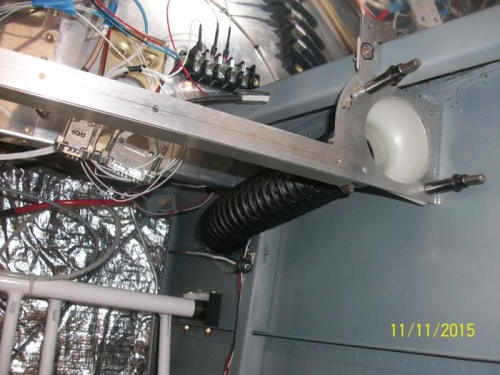
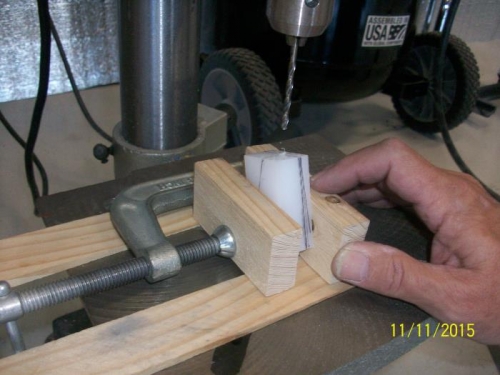
The anchor blocks were fitted to the side rails and marked for the holes that capture the pins on the canopy frame. This is a little tricky because the ipins enter as a downward and inward angle. I rigged up a jig using a clamp and blocks of wood to porperly orient the anchor blocks for drilling. This worked great and the anchor blocks capture the canopy pins perfectly. The anchor blocks were then drilled to the mounts, holes deburred and countersunk and the block attached using specified hardware.