Brief Description: Control bracket finalized and installed, canopy br
Having finally come up with a viable solution to the control cable mounting I continued work on this new 'bracket' and finalized it by prepping, deburring, match-drilling (the mounting holes), priming and then installing the cables and knobs for a final time. Endplate 'caps' were made for the open ends of the extrusion, first in wood but then in aluminium angle stock. these were dry fitted and will be glued in place when the cables are completely attached to the engine and working and the panel completed. I then tied up and saftied the cables and cable ends and then installed the entire assembly in the cabin and onto the front deck and panel structures, where it will stay permanantly now (unless removed for maintenance or replacement in the life of the airplane).
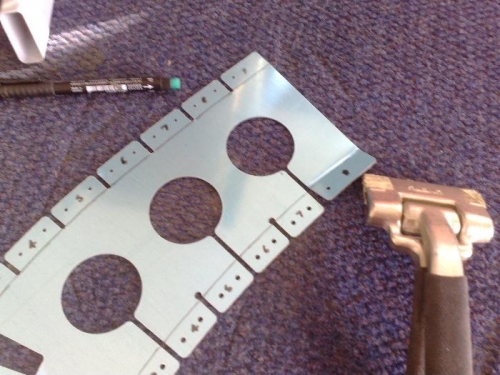
I then moved my attention to the Canopy tip=up 'shroud' structure and the components making up that assembly. First of these to get identified and worked was the three braces F-7128B L&R and F-7128A center brace that were to be fixed inside the canopy frame to skin. These neded some trimming and forming to fit in the intended locations on the canopy frame. Also the parts had multiple tabs all along the upper and lower edges that had to be bent by hand, individually and at the right angle to allow the brace to seat properly. With precious little information on how to do this I devised a little tool from hardwood with a 1/4" slot that was sized to fit the tabs and was used to bend each one accordingly. A timeous process since I had to bend then fit then re-bend each of the 34 tabs. Then I turned my attention to the lightening holes cut into these parts. The instructions say to 'bend' a 1/4" flange on the edges of these holes using a slotted block (like I did with the tabs), but a continuous and neat circle flange had to result which I certainly found impossible. I researched other methods but only found one other using the cleveland 'edge forming tool'. This was a tedious and horrible task and all I was getting was deep rings etched around the holes a