Labeled the latch blocks “forward” and “aft”. Marked a vertical centerline (centered on the 5/16-inch hole) on the aft side of the aft latch block and on the forward side of the forward latch block.
Used tape to hold the forward and aft F-873M Latch Blocks in position on the fuselage.
Closed the baggage door and turned the key to engage the F-873K Latch Pins in the F-873M Latch Blocks.
Pulled the baggage door tightly closed by stretching two strips of duct tape between the F-873A-1 Baggage Door Skin and the F-820-R-1 (RV-8) or F-891-R-1 (RV-8A) Forward Side Skin. Verifed that the door was flush with the F-821-1 Forward Top Skin.
Rotated the F-873M Latch Blocks so the previously drawn centerlines were visible in the two 1/8 screw pilot holes in the Firewall Assembly and F-866B-1 Upper Forward Baggage Bulkhead. Marked the location of the screw pilot holes by match-drilling #30 into both latch blocks.
Removed the F-873M Latch Blocks from the fuselage.
Using a drill press, drilled #30, then final-drilled #19, the pilot holes in the F-873M Latch Blocks.
Machine countersunk the two screw holes in both F-873M Latch Blocks for flush screws. Countersunk the side of the latch blocks that will be visible in the baggage door opening.
Slightly chamfered the edge of the 5/16 latch pin hole in both F-873M Latch Blocks.
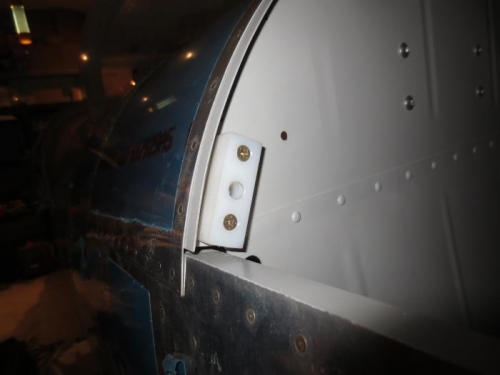
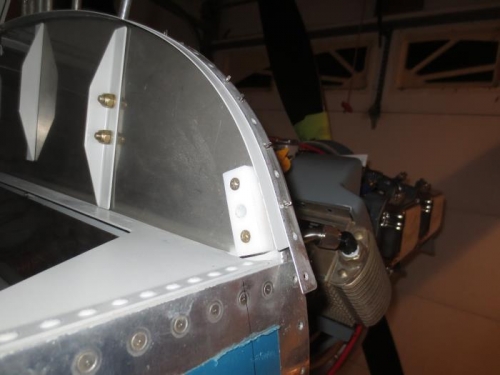
Installed the F-873M Latch Blocks in the fuselage using the hardware depicted in “F-873M Latch Block”, DWG 84.
Installed a piece of foam as shown in “Baggage Door Aft View”, DWG 84.