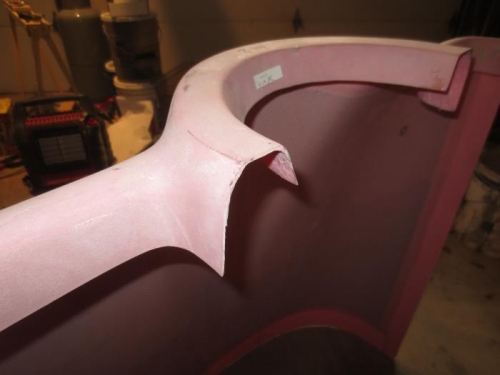
The first step in mounting the cowl is to attach the piano hinge to the fuselage. Although it is a simple and secure attachment it requires reaching in through the oil door to insert or remove 2 of the pins from the piano hinge to install or remove the upper cowl. I was concerned that the air oil separator, GPS antenna mount or oil cooler mount I have already installed would make that operation difficult so I have decided to go with the skybolt mounting system for the RV-8. While waiting for the parts to show up I have decided that I would start cutting the upper cowl. I started out by laying out a reference line on the fuselage according to the instructions. The probem I have with this is with the cowl sitting on top of the fuselage the measurements at the spinner and at the transition point on the fuselage where the firewall bend is will be off so I made the first cut about 3/8" longer than it should be. I then cut and drilled 8 tabs to cleco on the fuselage for the cowl to rest on so that it will be at the proper height and not resting on the fuselage. Then after placing the cowl in place on the tabs I set up a laser level and also leveled the fuselage, front to back and side to side. with the laser leveled dead center on the spinner and using a level on the floor I measured up and leveled the cowling and marked the laser line on the front of the cowl. I used a stack of popsicle sticks taped together on top of the starter ring to set the height of the cowl 1/4" below the spinner to account for the engine settling as the engine mounts compress. Finally I slid the cowl forward to touch the spinner bulkhead and centered it and using a compass set to 1/4" I scribed a line on the cowl 1/4" from the fuselage. I will sand to this mark. That should give me a perfect fit between the cowl and the fuselage and leave a 1/4" space between the cowl and the spinner
first cut finished and the cowl resting on the tabs