
|

|
|
|
Christopher's Web Site
|
Date: 12-10-2016
|
Number of Hours: 6.00
|
Manual Reference:
|
Brief Description: Horizontal Stabilizer
|
|
I actually haven’t done any significant sheet metal work for a while, so I was excited to start this project.
I looked everywhere for instructions and/or guidance as to how to build this, but all I could find was the drawing on the blue prints, and photos of what Tom did to build his last year.
I figured out the shape of the leading edge and made a paper mock up to determine how much metal I needed to make a finished wing width of 10”. I can’t remember, but I think it was about 21”. Whatever it was, the width came out as exactly 10”, which is really cool.
I used a piece of aluminum flagpole cut down and screwed to the workbench over the full sheet of metal. Then I slowly began to bend the metal until the two trailing edges met.
Even though the edges were meeting, the pressure for them to come apart remained very strong, so I had to use several clamps during the fitting process. I cut a piece of aluminum stock to the length of the stabilizer as a filler for the trailing edge, and was able to drill though the materials on each edge and get a couple of clecos in place to hole it together. I then measured to the center and put in a third to take some of the pressure. I didn’t want this springing back on me. After that, it was just a matter of making the rivets no greater than 1 inch apart. (To be continued)
|
|
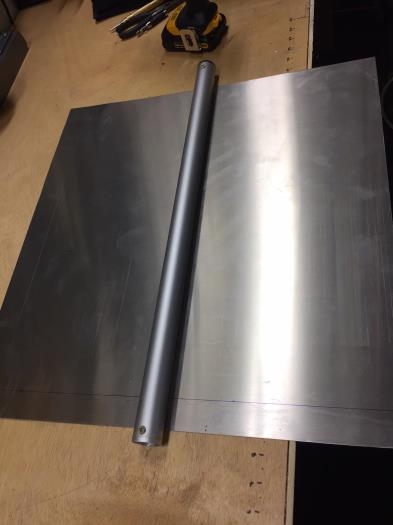
Prepared to shape
|
|
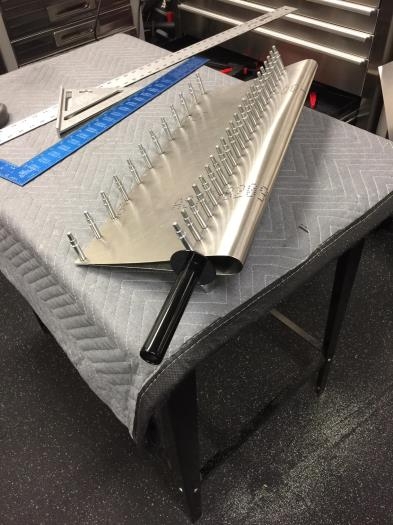
Holding shape with cleos
|
|
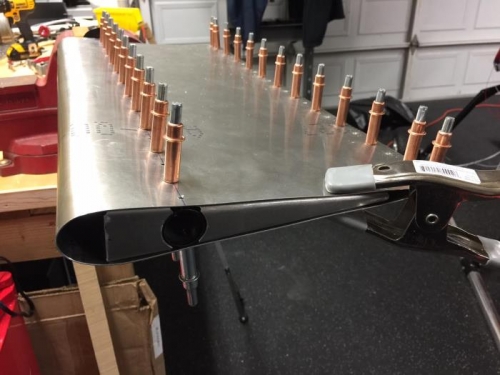
End cap inserts
|
|
|
|
|
|
|
|
|
Copyright © 2001-2024 Matronics. All Rights Reserved.
|