
|

|
|
|
Christopher's Web Site
|
Date: 1-23-2016
|
Number of Hours: 6.00
|
Manual Reference:
|
Brief Description: Skids/Heater ducts/Pitot/Temp Gauge
|
|
The entire installation of the skids went much better than planned. I measured up from the ground to the exact center of the tube on the skid shoe, and once I had the skid perfectly aligned and pointing up in the proper orientation, I drilled each side of the shoe independently. Once each side was drilled, first with a pilot hole and then with the 1/4” bit, only then did I drill the holes through together. It came out great.
I was very motivated to install the below the floor heater duct work because that would mean that I’m one step closer to installing the floor panel. My design and idea was to not only specifically direct the flow of air under the floor, but to also add a bit of help for the heater to enter the cabin on those cold days. When I had my convertible Saab, there was more than once that I wanted the top down even on a cold day. I figure I will feel the same way regarding the cabin doors, so an in-line blower felt like a good idea.
I plumbed the line from the firewall, then added the blower, secured to the frame of the helicopter, then continued the duct to the middle rib. Each connection was made with a 3-1/4” SS hose clamp. I then continued the duct forward, split it into a aluminum “Y” and ran equal ducts to vents located between each set of tail rotor pedals. Many Safari’s stop the duct work for the cabin heat at the middle rib and let the heat passively exit through several holes cut in the forward rib. My concern is that this would not necessarily direct the heat where you wanted it, but more importantly it would allow heat to enter into both the console and the instrument pod where all of the electronics are housed. I’m not sure it’s a huge deal, but those instruments are generating their own heat, and I can’t see adding to the issue.
Finally, I connected the pitot tube to its hose with a small Oetiker clamp and installed the exterior temp gauge right behind the pitot tube.
|
|
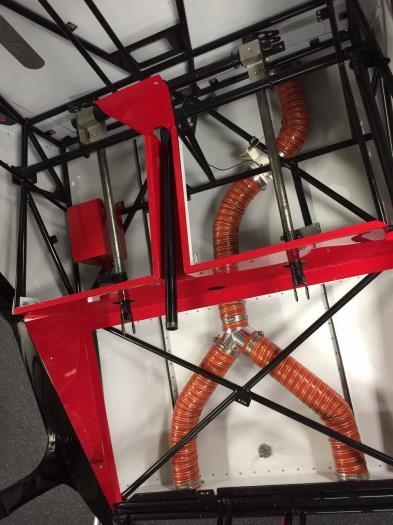
Heater ductwork
|
|
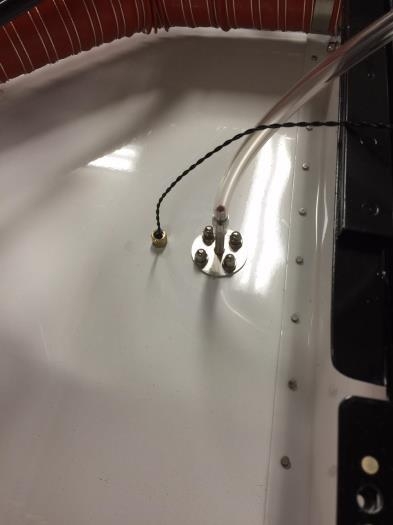
Pitot and temp gauge
|
|
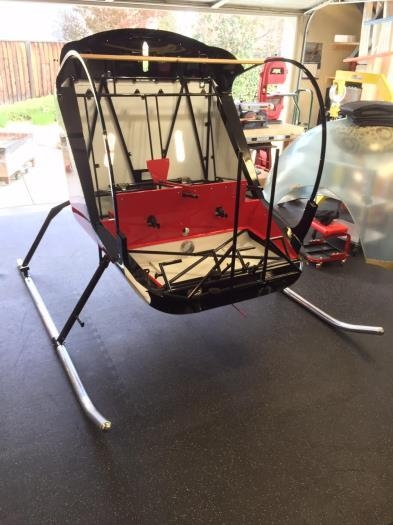
Skids Complete!!
|
|
|
|
|
|
|
|
|
Copyright © 2001-2024 Matronics. All Rights Reserved.
|