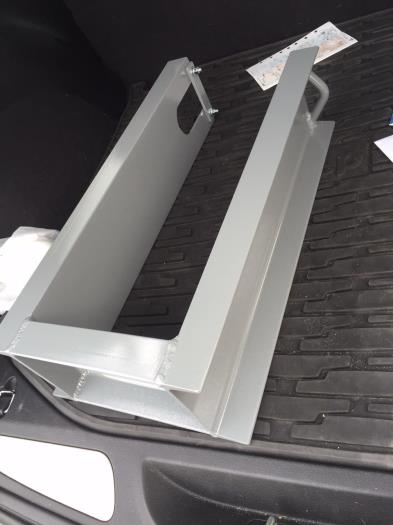
My buddy Brian connected me with a guy who could assemble the materials and weld the engine hoist. He actually builds off-road dirt bike frames but used to fly the family C182 so he was interested in taking on a weird aviation related project. The price was great and the turn around was fast, so I was happy to give him the job. Thanks Curt!! It came out great!!
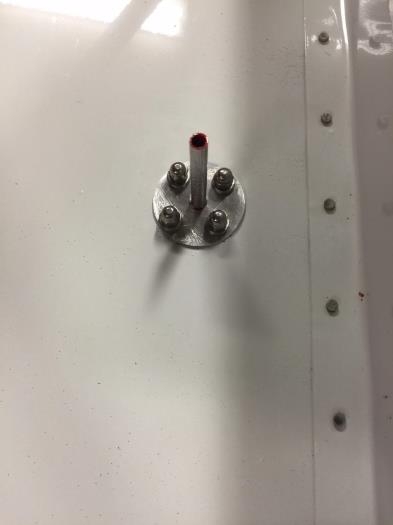
I also permanently installed the pitot tube after making a backing plate for the inside of the belly with a hole saw. I also used a adhesive sealant between the tube and exterior belly, and finished off the installation with lock tight and acorn nuts so it couldn’t snag anything in the future.
Now that I am preparing the floor of the cabin for installation, I prepared the interior kick panels for installation as well. These need to go in first because the floor lays over all of their returns and is screwed down as one unit. The installation went great and the red really makes a statement against the black exterior and door sill paint. Remember, the floor will be covered with black carpet, so there will not be as much of a red interior as there is during the reassembly.
In preparation for the floor installation, I will next need to install all of the interior cabin heat duct work. Before I do that, I have to install the forward rib vents which are chromed plastic and originally designed for marine use. I installed the vents so they are pointing up in order to facilitate the direction of the warm air up the inside of the bubble for defrosting and occupant comfort.