
|

|
|
|
Rogers Web Site
|
Date: 6-4-2014
|
Number of Hours: 4.00
|
Manual Reference:
|
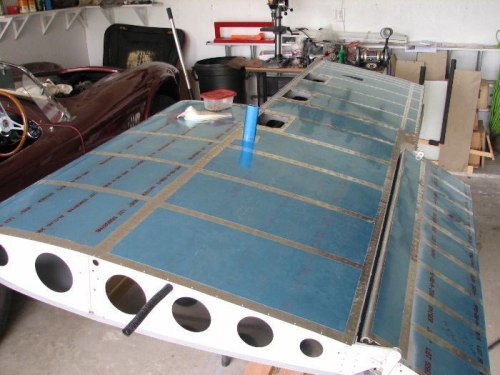
Brief Description: Starboard wing lower skins
|
|
I'm finished with plans for the wings, I'm not putting aerials in them for instance, only position/landing lights and the pitot, so I thought I'd 'bolt them up'. I've read that the tips are weak and can crush, so they will need reinforcement later on.
I followed the manual, except, for where it says to do the skin join last (just the skins not the skins/rib at the join). I took this to mean finish riveting the skins and then rivet the ‘skins only’ join line next to the rib line. This would be impossible (for me), so I did it as I went, keeping the 'skins/rib' and 'skins only' rivet count the same working forward to the spar.
If you can leave the tanks on(I didn’t), it'll be easier than putting them on after riveting.
I will retest the port tank, and if it still passes, fit it before riveting the lower skins on (lesson learned).
I still need to do both NACA ducts as well.
Leave the control rods out, until after riveting, both control rods get in the way and use space that you will find useful. I ended up unbolting the control rod/spar mount, to give me some more room, so I could get my hand 'in there'. Another lesson learned.
My wiring ducting was in the way too, so I pulled mine out and refitted after riveting.
Prepare for small cuts and skinned knuckles/fingers. I found as I got closer to the front spar, my forearms are really too long to go through an inspection hatch, and had to force my arm along the wing, which meant I ended up with scrapes on my hands/fingers and elbow. I had deep red lines that looked like incisions.
I found it easier to hold the panel I was working on, up at its front spar outer corner. This allowed me to get 'in there' a little better. The inner panel being thicker, it is harder to do this, and attention must be made to how much bend there is down by the wing to stop a crease forming. Working over the leading edge to get to the rear spar had me at near full stretch, but isn't too difficult.
I riveted the rear spar working toward the tip until I was ha
|
|
Riveting finished
|
|
|
|
|
|
|
|
|
Copyright © 2001-2024 Matronics. All Rights Reserved.
|