
|

|
|
|
Rogers Web Site
|
Date: 9-19-2013
|
Number of Hours: 2.50
|
Manual Reference:
|
Brief Description: Fuel tank sealing
|
|
Shortly after the tank sealer arrived, I opened the cans and found what I'd be dealing with. I originally had thought that, as a lot of people seemed to be using syringes for sealing tanks, I'd be using something that had a consistancy of a thick syrup, or treacle.
However the consistency looked to be more like a runny putty. So I decided to go the 'brush technique' that some have used. I thought that I either become messy brushing the sealer onto the various parts, or I become messy trying to fill the syringe.
I luckily mixed just enough to do both sets of stiffeners, fuel cap housings and fuel drains.
It worked out to some 60 grams, and I thought that the sealer was starting to become more difficult to work with near the end. However, this is San Antonio, TX, and it was 92 F(33 C) today when I was working. I will make smaller batches next time.
I clecoed every rivet hole to clamp parts together properly. I also measured the fuel cap housings for the correct rivet callouts. As I'm using the deluxe fuel caps, the rivet callout in my plans(for the basic fuel housings) are too short. The rivets used will end up being three different lengths.
I used masking tape to contain where I was appllying the sealer, as I have lots of masking tape and decided to use it up. I plan to 'wet rivet' the various parts tomorrow.
With hindsight my worries about using proseal seem to be unfounded.
|
|
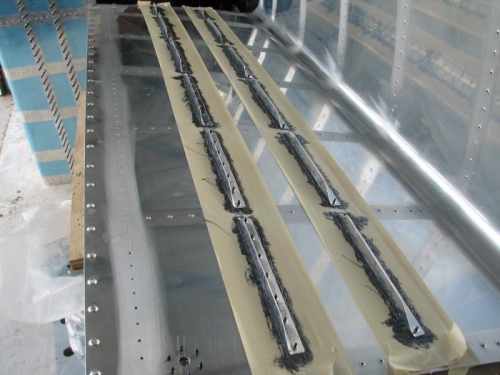
The left tank and stiffeners, the drain is on the lower edge.
|
|
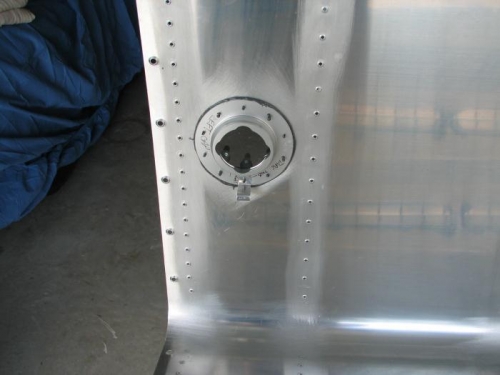
The left tank fuel cap housing.
|
|
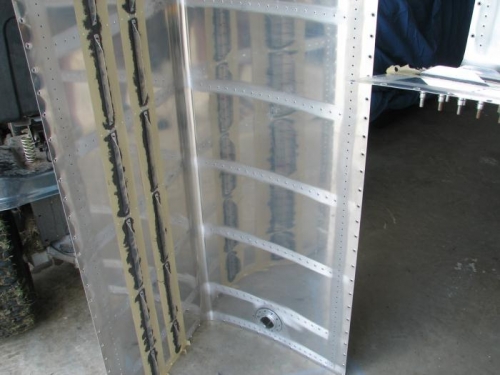
The right tank skin, stiffeners, and fuel cap housing.
|
|
|
|
|
|
|
|
|
Copyright © 2001-2024 Matronics. All Rights Reserved.
|