
|

|
|
|
ROBERT'S WEB SITE
|
Date: 11-9-2014
|
Number of Hours: 2.00
|
Manual Reference:
|
Brief Description: Fuel Tank Wiring
|
|
Well, they aren’t quite “wire bundles” but this is the first wiring I’ve done on the project. The capacitive fuel indication system has very simple wiring requirements. One wire running between each plate with a lug crimped on each end and a second, shorter wire that runs from the inboard plate (crimped lug) to the BNC connector mounted on the inboard rib. The crimping I did with a nice crimping tool I got from Steins. The crimps get solder for back up and the BNC connector connection is also soldered. Vans instructions call for terminating the lug on the shorter wire on installation, but I think I have a scheme to be able to terminate both ends on the bench before installing it. I believe that I can get both wires through each bushing prior to installing both the vent line and inboard rib. If I’m wrong, I’ll half to install a splice on the shorter wire (which other builders have done). We’ll see if I’m right when the time comes.
So, the tasks today were to mock up the wire bundles, cut the wire to length, crimp on the lugs, solder the lugs, and solder on the BNC connector. One set for each fuel tank. I was debating getting a nice soldering iron for this task but ended up scrapping the blue vinyl residue off of my old pencil soldering iron and using that. It seemed to work just fine. During the mockup I marked the “clocking” for the lug on the outboard plate. It needs to be installed to clear the vent tube. Once the wires were crimped and soldered, I installed the lug on the outer plate with the screw, washer, and nut. All the wire connections will get sealant coatings next.
|
|
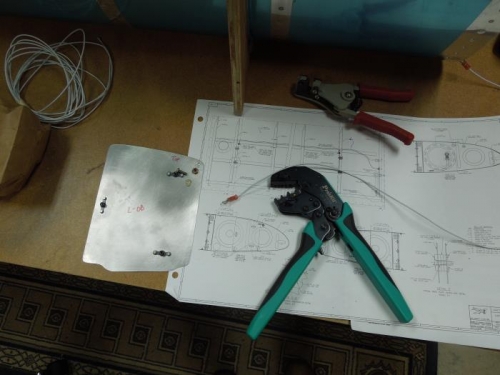
Crimping on terminal lugs
|
|
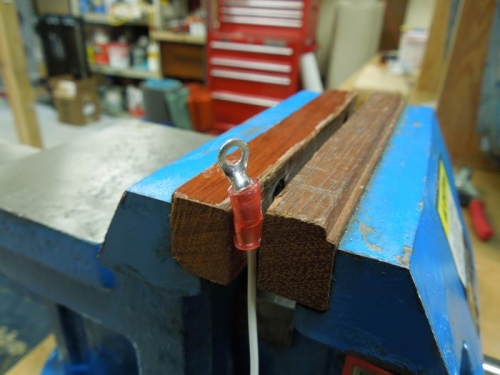
Solder to secure crimp
|
|
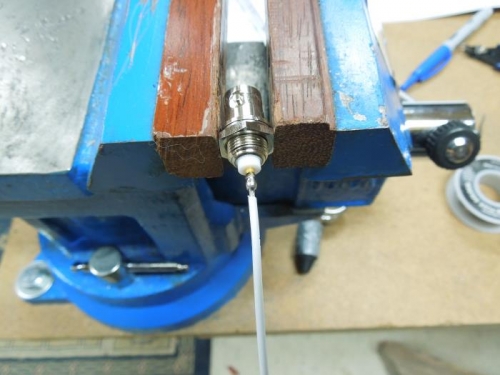
Wire soldered to BNC connector
|
|
|
|
|
|
|
|
|
Copyright © 2001-2024 Matronics. All Rights Reserved.
|