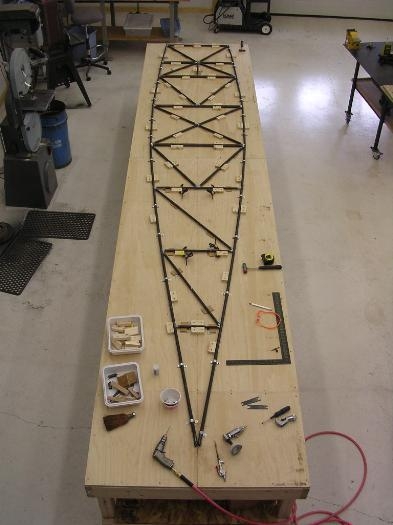
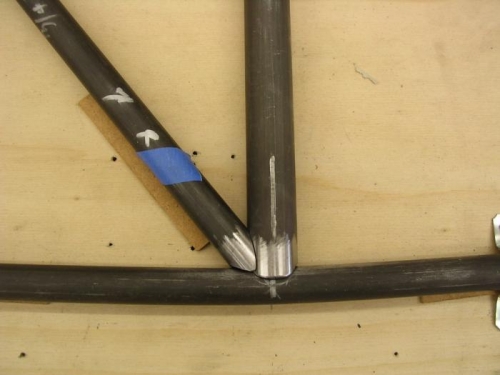
I tacked the fuselage today! I made sure all the measurements were correct and went over it one more time. I marked the diagonals that were not to be tacked to the cross tubes at stations B, D and E with blue tape so I wouldn't tack them by mistake. This is because the fuselage gets bends at these points later on and it allows the diagonals to rotate on the cross tubes.
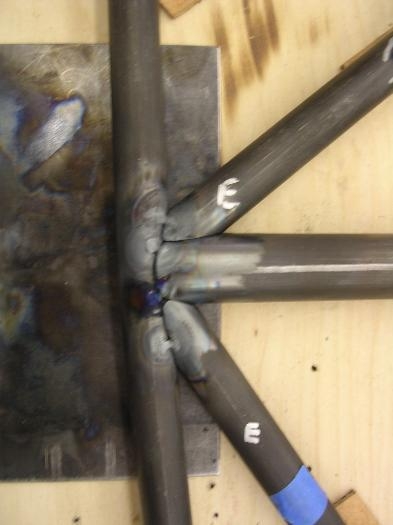
I first got some scrap and practiced a bit and it seemed easy enough. I started in the back and worked my way forward, going side to side. I have to admit, it was harder than I thought. The different thicknesses of tubing were tricky to tack, especially the 5/8ths .035 to the 3/4 .049. There were a few places that wern't very pretty. I had to constantly adjust the flame for each tubing thickness. Sometimes it was a little too hot, other times it just wouldn't do it so I had to increase the flame a bit. Another thing that was suprizing was how little adjustment it took to increase or decrease the heat of the flame. I finally got the hang of it. One other thing that was funny was that I have cheaters in my welding goggles. After my first few tacks, I was suprized how small they were. The reason being is they looked bigger with the goggles on! They're only 1.50.
A pleasant side effect of the 1/8th shims under the longerons was that I was able to use a piece of thin steel plate to shield the table from being burned too badly. It worked out great.
I have to got out of town for a few days, so next Sunday I'll take it out of the jig, flip it over, tack the bottom and then go on to the top of the fuselage.