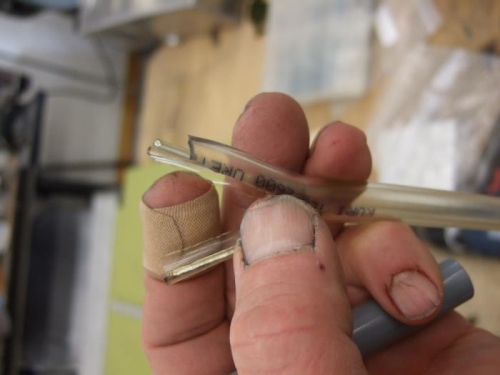
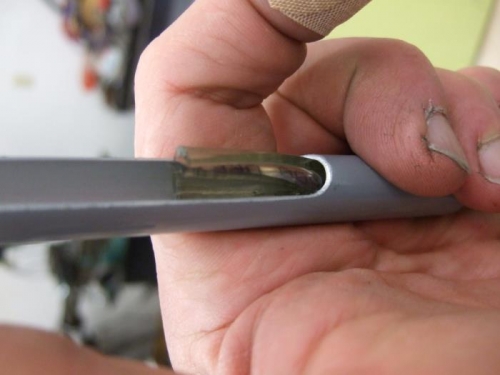
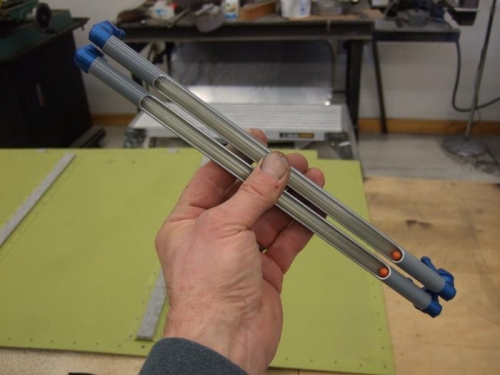
Once the tube windows are cut, all that remains is to assemble the pieces. The fuel tubing is a bit too large for the AL tubing (on purpose) so the end has to be split about 1 1/2 to 2 inches from the end. This allows the end of the clear tubing to fit through the AL tubing. Once pushed through it’s easy to grab one of the split ends with a pair of pliers and pull it through. Putting a little lube like WD40 on the tubing helps. Pull enough through so you can push it through the other end and grab it with pliers. Work the belly out of the middle by pulling on the ends and basically snap the clear tubing into the AL tube. Because the saddle notch isn’t quite half-way around it will hold the tubing nice and secure. Once that is done trim the ends even and insert one of the aluminum fittings all the way into the tube. The end of the fitting should just be visible through the window. Make sure it is positioned so the other end of the fitting points 180 degrees away from the window. Put the indicator ball in the other end and it should fall free in the tube. Then insert the other fitting. The tube is a tight fit and the AL tubing acts like a clamp around the fitting and clear tube. There should also be a small orifice made in the bottom tube somewhere. A -4 rivet makes a great friction fit and can be drilled with a small drill. The idea being if there ever is a leak it won’t flood the cockpit with AVGAS, at least not quickly and will help dampen the indicator ball reading. I’m putting my orifice in the line from the tank.