Today was a good day. I got a late start, but I made up for it and got more accomplished.
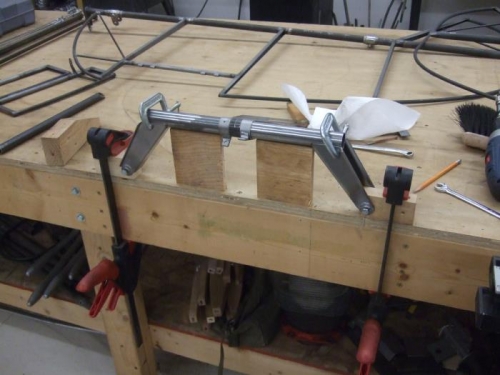
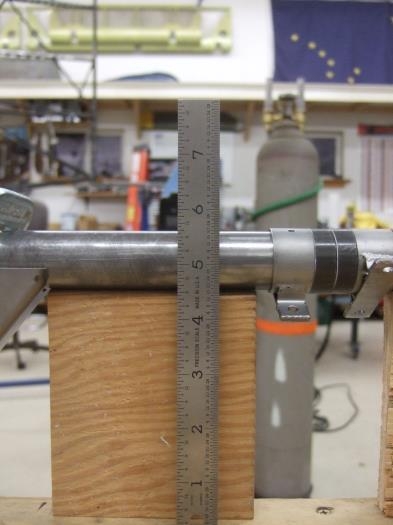
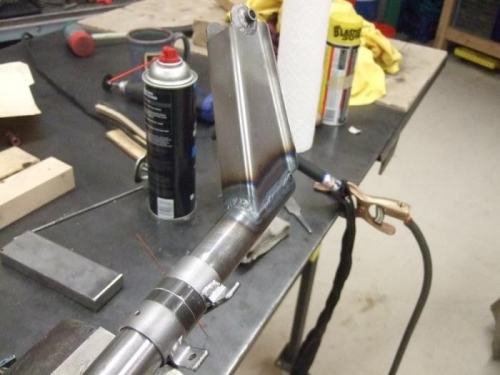
I put the support rings on the main tube of the control stick assembly and thought about the best way to jig the controls in place to weld. I did a little math and came up with a solution. The stick pivots are 18 inches apart and the centerline of the main tube is 4 ¼ inches from the center of the stick pivot bushing. I put the center of the stick pivot bushings 18 inches apart and ¾ inch above the jig table using some wood blocks cut 1 1/16th inches wide with ¼ inch holes for the stick pivot bolts. I used my drill press to make sure the holes were straight. Once that was clamped in place, that puts the centerline of the tube 5 inches above the jig table. I then subtracted half the main tube diameter (9/16ths) from 5 inches and got 4 7/16 inches from the jig table to the bottom of the tube. I cut two scraps of plywood exactly 4 7/16ths tall and used them to make sure the tube stayed level and straight. Once I double-checked everything, I tacked everything together, then welded the stick brackets length-wise along the main tube. Once that cooled, I took the assembly over to my welding table and finished welding along the curved part of the stick brackets that was hidden underneath. It looks great and I’m ready to finally move on to the next step.