Brief Description: Part 1: Router method for inspection hole parts
Note: The actually date for this was 11/26. I had to change the date to manipulate sequencing for multiple logs for this date.
First thing I did was take another look at the inspection hole placements on the plastic sheet. Looks about right so I cut the holes in the plastic and tried them out.
Continuing on with Glen Patterson’s method of cutting inspection covers and backing plates with a router about all I can say is "WOW!" His method works very nicely. I'm really glad he offered me the information. It worked so well I decided to take it one step further and cut the holes in the wing panel using this method too. What I ended up with is inspection plates, mounting rings and holes that are all consistent and matching. No need to trim or file down. I'm going to archive the process here for my own recall and anyone that may wish to do the same. I'm going to have to do it in several parts because pictures help to understand it and the log page is limited to 3 pictures.
The following is Glenn Pattersons method with the adaption to the process I made:
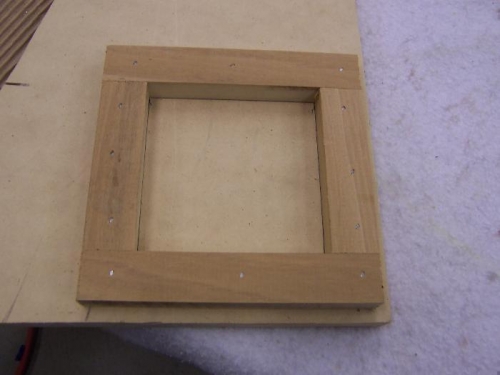
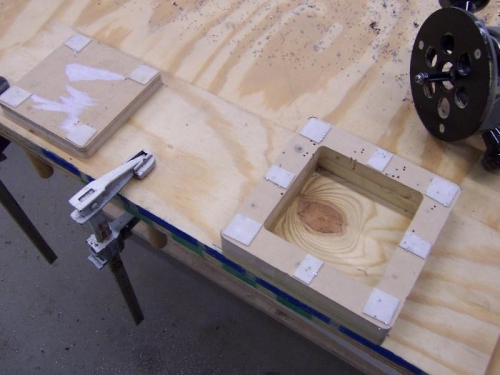
INSPECTION HOLE BACKING FLANGE TEMPLATE: Cut a wood strip to the width of the backing flange & cut and glue like a picture frame on a piece of MDF. This makes it simple to get to the final shape without a lot of tricky wood work. Run a 1/2" flush cut router bit around the picture frame and the bottom MDF will be the aluminum template. The MDF will have an inside corner radius from the router. The outside corners can be radiuses on a belt sander. I mounted this jig on the same piece of plywood that the cover jig is mounted on and clamped to the table. (I believe Glenn used a table router for this one too.)
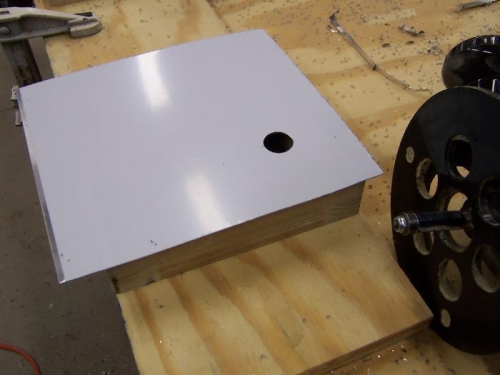
On the MDF side apply some double sided tape. Cut an aluminum blank out of .032 material and drill a 3/4" hole somewhere inside the frame and lay the aluminum on the jig and press to the tape. Trim the aluminum to the pattern with the router. Make a pair to use at the aileron as it straddles a rib & they can be cut to suit.