Brief Description: Leading Edges Riveted, Stall Warning Complete
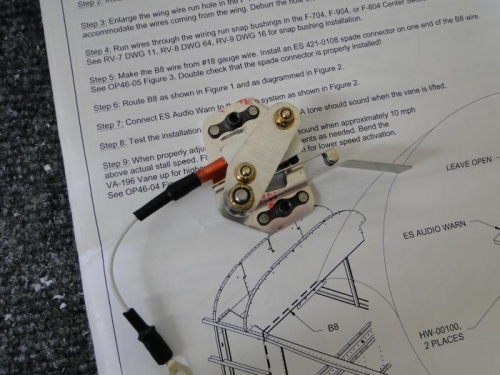
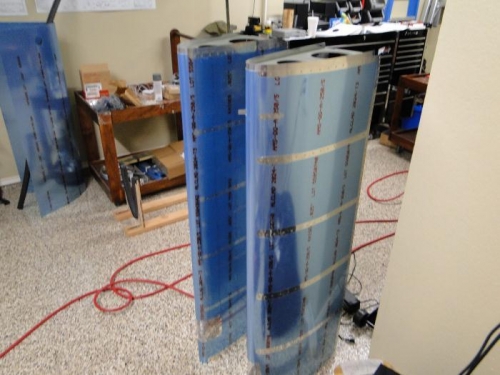
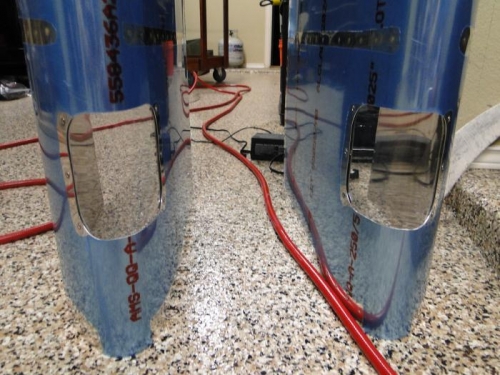
Today, I began by clecoing the left leading edge together and began work on the stall warning assembly. I assembled the switch and tab and attached the assembly to the mounting plate. I then riveted the mounting plate to the leading edge. Next, I bolted the stall warning tab to the mounting plate and adjusted the warning assembly per the instructions. Next, I began working on assembling the leading edge landing light for the left wing. I cut the hole for the light and deburred all edges. Next, I prepped and cut the plexiglass cover to size. I then riveted the plate nuts to the mounting brackets. I then drilled and dimpled the wing skin for the attachment screws. I then added the foam to the edges of the plexiglass to prevent moisture from entering the wing. Finally, I attached the plexiglass assembly to the wing. I then added the platenuts to the interior ribs to allow attachment of the light holder. I am awaiting the arrival of my Whelen Prometheus Landing and Taxi lights, and I will install the remainder of the assembly when they arrive. Gareth then arrived and assisted me with riveting the leading edges together. I could not be more happy with how these are looking, and riveting is much easier with two people. I left the end rib unattached to make installing the Prometheus LEDs much easier.