
|

|
|
|
Stevens Web Site
|
Date: 8-13-2007
|
Number of Hours: 3.30
|
Manual Reference:
|
Brief Description: Fabricated baggage bulkhead access door
|
|
Tonight I continued work on the baggage bulkhead access door. This door will help provide access to the rear of the instrument panel. It is not in the plans and I have had to do a little shade tree engineering (quite a feat for this feeble family lawyer mind) to ensure that I am not compromising the structural integrity of this bulkhead. Previously, I cut out a doubler for the door opening out of .040" aluminum (problbly a little overkill). Tonight, I drilled all of the holes to attach the doubler to the bulkhead, along with the nutplates which will allow me to screw the access panel into the bulkhead, giving it more strength. I drilled for the nutplates with a special jig, which makes life much easier. Without the jig, I would have to use a spare nutplate, fasten it onto the metal with a screw and then use the lugs of the nutplate to drill through. The jig is much faster. Once all of the holes were drilled, I had to dimple and countersink the aluminum plate to allow for flush rivets behind the access door (the door would not close fully if round headed rivets were used). Then, I primed everything and riveted the doubler to the bulkhead. Finally, I cut out the door itself from .030" aluminum I had around the shop. After trimming it to fit, I drilled out some hinge material to hold the bottom of the plate onto the bulkhead. Tomorrow, I will fabricate a little filler strip for behind the hinge and then prime the door and rivet on the hinge.
|
|
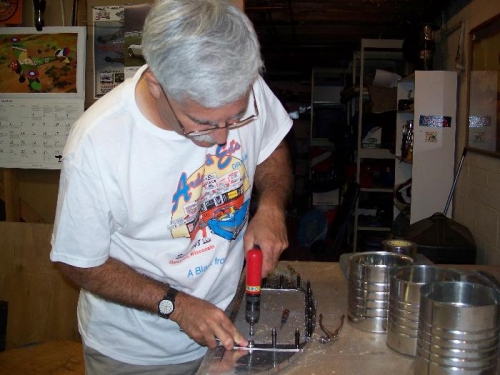
Drilling for the nutplates on the baggage bulkhead
|
|
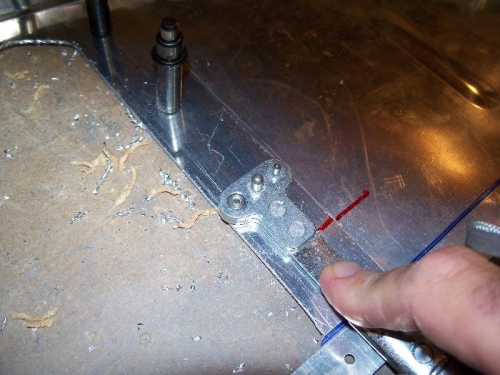
This nutplate jig really saves time
|
|
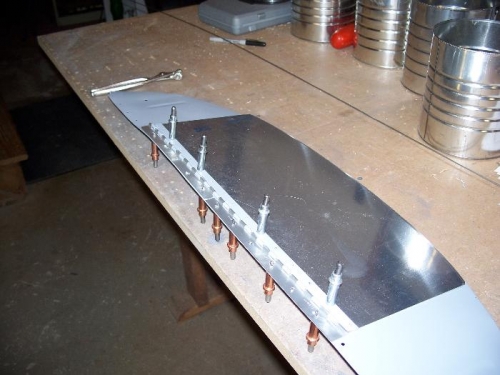
The access door with the hinge on the bottom
|
|
|
|
|
|
|
|
|
Copyright © 2001-2024 Matronics. All Rights Reserved.
|