
|

|
|
|
Stevens Web Site
|
Date: 2-1-2007
|
Number of Hours: 2.30
|
Manual Reference:
|
Brief Description: Repositioned the forward gussets and began skin pr
|
|
Last night I was in a quandry about how to fit the forward fuselage gusset. I took a photo of the gusset, as I had drilled it, and sent it to Vans for consultation. Today, I got the word that the gusset is supposed to be fit behind the weldment, not in front of it. No prob. I just fit the gusset behind the weldment and used the same holes. After deburring and priming the gussets, I riveted them on, as per the plans. Now, I begin the long task of preparing all of the skin sections for riveting to the fuselage skeleton. As before, this will entail : 1. Melting away the blue plastic from the front of each panel where there are holes to be deburred and dimpled, 2. Removing all of the blue plastic from the back of each panel (which will be primed), 3. Deburring all of the holes, 4. Smoothing the edges, 5. Scuffing the back of each panel for priming, 6. Dimpling the panels for the flush rivets, and 7. Priming the back of each panel. Tonight, I started with the left front side panel. I melted the plastic from the rivet lines, removed the plastic from the rear of the panel, deburred the holes, smoothed the sides and scuffed the back of the panel to prepare it for priming. I think I will tackle the right front side panel tomorrow. I have not started dimpling yet. It is going to be complicated, because there are two sizes of rivets and some of the holes do not get dimpled at all.
|
|
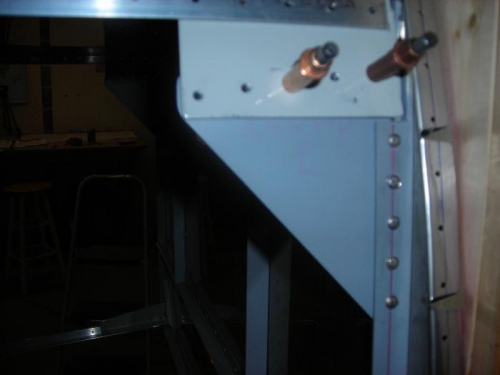
Forward gusset, riveted into the correct position
|
|

Beginning prep on the left front side panel
|
|
|
|
|
|
|
|
|
Copyright © 2001-2024 Matronics. All Rights Reserved.
|