
|

|
|
|
Stevens Web Site
|
Date: 10-31-2007
|
Number of Hours: 3.30
|
Manual Reference:
|
Brief Description: Set the elevator stops
|
|
Tonight was Halloween, so I got some work done in between giving candy to local kids dressed as cheerleaders, balerinas and lions. I am taking my time in setting up the empenage, because I definitely do not want to build this tail crooked. First, I drilled the two elevator horns for the bolt that will go through both of them. It is important to drill the elevator horns exactly square while the two elevators are exactly lined up in trail. This is a little difficult because one elevator horn is a little bit forward of the other one. Apparently this is not uncommon, because the plans tell you to drill the aft most horn first. To drill the horns perfectly square, I sawed a piece of aluminum that was 7/8" thick and then drilled a 90 degree hole through it in the drill press. Then, I drilled the aft most horn first, clamped the aluminum bar with the 90 degree hole between the horns and drilled through the first horn and the aluminum bar to make the second hole in the other elevator horn. Next, I trimmed and filed the down elevator stop until I had the right amount of swing on the elevators. The up travel is supposed to be between 25 and 30 degrees. Mine is now 28 degrees. The down travel is supposed to be between 20 and 25 degrees. Mine is now 22 degrees. Close enough. Then, I riveted the up and down stops to the fuselage. It was tough riveting because it was hard to get the bucking bar in that little space straight.
|
|
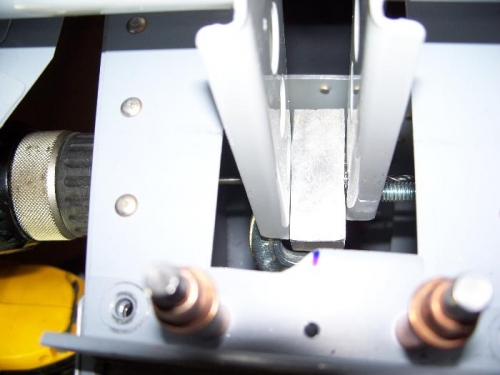
Drill (left) propels the bit through the left elevator horn, then the guide block, then the rt. horn
|
|

Up elevator stop, riveted to the fuselage
|
|
|
|
|
|
|
|
|
Copyright © 2001-2024 Matronics. All Rights Reserved.
|