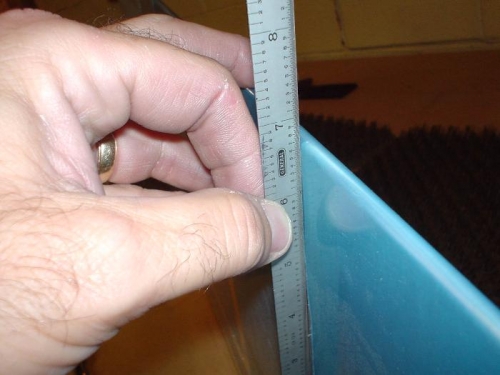
I started the night by squeezing the elevator trailing edges in the 2x8 squeezer. I finished up the bends with the hand seamer. Worked like a charm. Photo 1 shows that the trailing edges came out just right.Next I prepared the left elevator skeleton. This time, I buffed all of the edges as I started each piece, rather than waiting till I deburred the holes. I fluted and straightened the ribs. Then I assembled the tip/counterweight assembly. It was a bear to get the end rib and the counterweight skins to cleco together. I then drilled the counterweight with lots of boelube. Next session, I will fit and drill the left elevator skin to the skeleton.