
|

|
|
|
Stevens Web Site
|
Date: 9-9-2006
|
Number of Hours: 2.00
|
Manual Reference:
|
Brief Description: Aligned ailerons and started flap installation
|
|
Today I aligned the ailerons and Vicki helped me start on the flap installation procedure. First, I assembled the aileron belcranks in accordance with the plans. I had to ream the bellcrank bushings to 1/4" (fortunately, I just happened to have a 1/4" reamer which I purchased at a long ago forgotten flyin). Next, I constructed the thin plywood jig from the plans to help center the aileron into a perfect trail position. The jig utilizes two tooling marks in the wing rib to attach the jig. Unfortunately, I mistakenly enlarged one of the tooling holes in the right wing rib. So, I first aligned the aileron in the left wing (where I had not boogered the tooling hole) and then I drilled a hole in the jig where it would show an undrilled part of the rib. I then marked a spot through the hole with sharpie and measured the distance from that mark to the bottom of the rib. When I used the jig on the right wing, I marked a small line that same distance from the bottom of the right wing rib and simply aligned the sight hole with the line to make the jig line up with the center. Using the jig was simple. I clamped the aileron so that the trailing edge centered in the two lines (see photo 2), put the aileron bellcrank jig on the bellcrank (see photo 3) and then adjusted the aileron push rods (which I made up earlier) so that the bellcrank jig is flat against the spar and the aileron trailing edge lines up with the parallel lines on the aileron centering jig. Flushed with the feeling of accomplishment in aligning the ailerons, I asked Vicki to come down into the basement and help me place the right wing on the work table so that I could install the right flap. She helped me wrestle the wing onto the table, then she held the right flap while I aligned it and clamped the flap hinge to the flap brace. Everything looked good, so we then drilled the flap hinge to the brace. A short time later, I realized that I aligned the flap to the aileron (as it says to do in the plans) but I only had the aileron bolted to the win
|
|
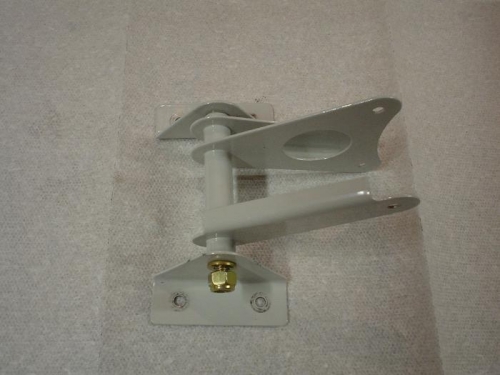
Fully assembled and greased aileron bellcrank
|
|
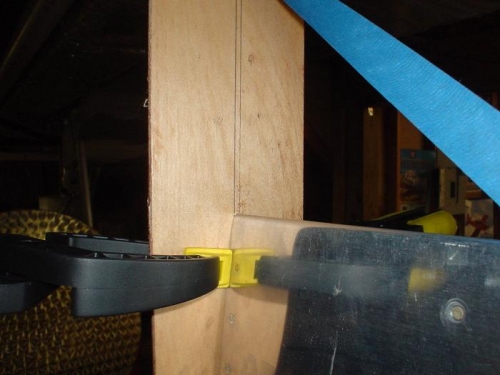
Aileron centering jig in action
|
|
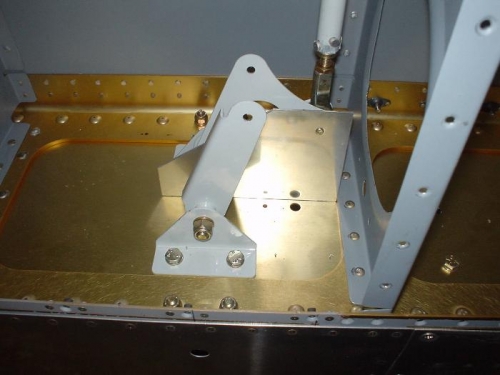
Aileron bellcrank with the centering jig (the unpainted alumuinum piece))
|
|
|
|
|
|
|
|
|
Copyright © 2001-2024 Matronics. All Rights Reserved.
|