I had to send Oregon Aero seat cushion heights that I wanted for the seats they will be making for the project. They have an instruction sheet that explains the process.....basically it is placing non-compressable items such as boards or books on the seat area and seat back and see what you want for height since the RV seats do not adjust up or down.
So armed with a bunch of perfect size 1/2 inch plywood pieces I had in the shed from a project years ago, I stacked up the pieces on each seat. The standard cores are 4" bottom and 1" on the backs....this is AFTER compression. Thus using the boards would simulate the "compressed" dimension.
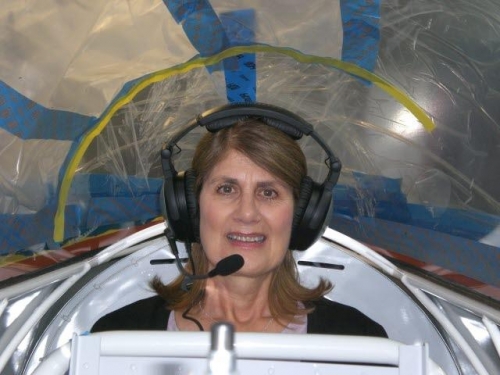
I started with 3 inches of board thickness in both seats I started with having Kathryn sit in the GIB seat with headset on to make sure there was sufficient canopy clearance. There was plenty so I added an inch to 4". Still good clearance. I then sat in it and with a taller frame the headset was rubbing the canopy. I deceded to reduce the compression back down to 3" in case a tall framed person like me sits back there.
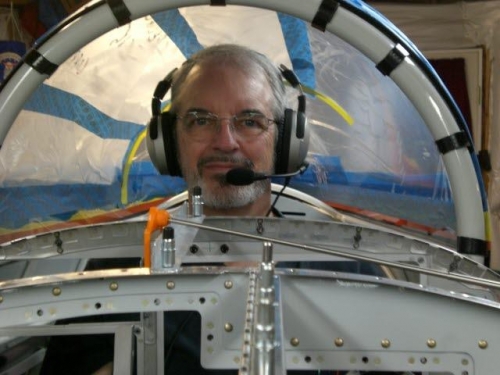
I then did the same process for the front PIC seat and with a 3" compression it gives me the canopy clearance of about 2 3/4 inches. It is easy to add a spacer if needed than to try to figure out how you can extricate someones head from the canopy.
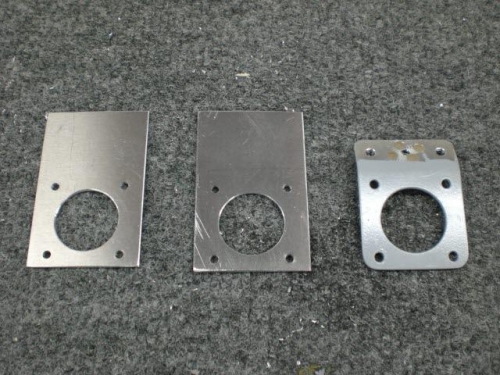
Finally I decided to remake the PIC Control Stick AMP bracket as I am moving it to under the front seat ramp after looking at the overall setup I feel it will be better served in that location and removable for taking the ramp off.