When I installed the bulb into the mount, the bulb has a metal tab that is suppose to fit into a notch in the mount cutout. Suffice it to say that the notch and the clip design do not perform as they are suppose to. I remedied the problem by fabricating a small alum clip and riveted it to the mount in such a manner that it holds the clip on the bulb and keeps it from turning. It works good and will keep movement and vibrations from rotating the light and twisting or breaking the wireing.
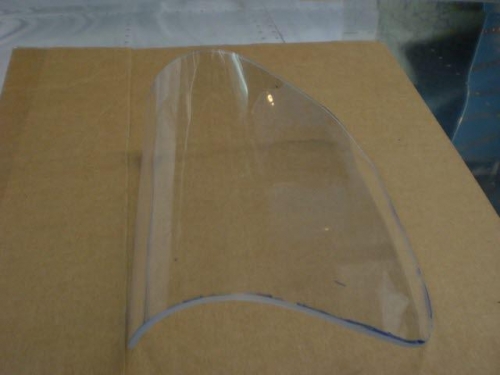
Next I marked the lens and using the bandsaw trimmed off the excess material. I finished the edges of the lens with sandpaper to ensure there would be no sharp edges or saw marks that would cause potential cracks in the lens. I drilled and countersunk the holes in the lens retaining strips and riveted the nutplates to the strips. Next I placed the lens in the proper position into the wing cutout and transferred the holes in the wing into the lens. You drill plexi SLOWLY! If you don't you will crack it! All the holes came out good, and I then countersunk the lens to receive the dimples in the wing skin.
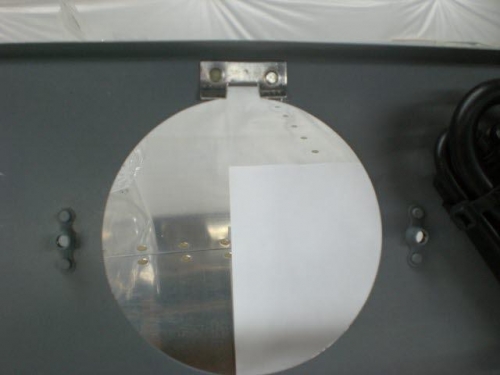
Next I dimpled the wing skin where the screws hold the lens retainers. Next I installed the mount in the wing. I made the initial adjustment as per the instructions. No doubt I will have to adjust the mount after the airplane is complete in order to aim the lights to my satisfaction for night flying.
The kit comes with foam seal that they recommend you place between the lens and wing skin. I installed the stripping. The lens fit a little tighter but it should seal the wx from bay better.