Brief Description: Modify Left wing Duckworth Light
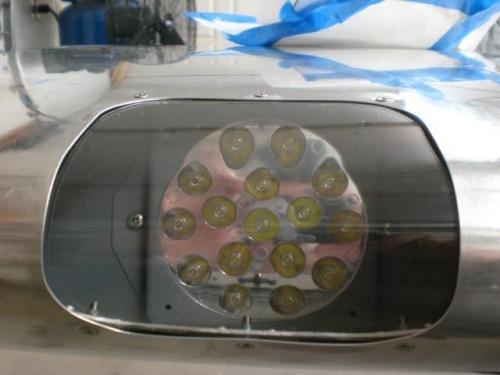
I continued to modify the Duckworks by cutting the left wing light hole to size to fit the LED light into the adjustable mount.
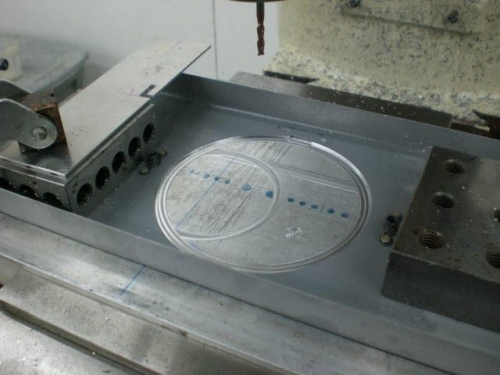
I cut the right wing bulb mount by setting the mount in the machine vise but the metal is thin and I had to be very careful of the pressure or it would bend and deform. This time I used my tooling plate and clamped the mount face down.....this was a far more rigid setup and there was no deformation of the mount from pressure on clamping from the sides.
I made the cuts and brought it to a diameter of 4.160 inches from the 3.990 measurement that it was prior to cutting. The bulb fit excellent only needing a little deburring to finish it off. The light clamping flange that goes in front of the bulb to secure it was just a touch too small by about .010 so I took the dremmel with a sanding disk and made a few revolutions and used some sandpaper to finish it and it fit perfect.
I then assembled the light and mount back in the airplane and installed the lens. Had it not been that the airplane kit I bought had the Duckworks lights installed....I would not have used them but since they are I changed to LED. Now I need to pull the wires to complete the install.
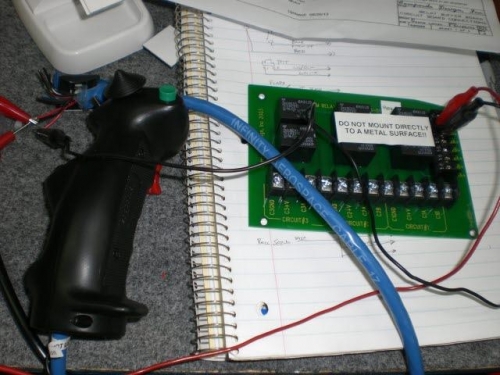
I was trying to look at the Relay board I got from Infinity and checked out a couple things then called it quits for the night. A good weekend in the shop.