This session involved putting all of the trim tab together now that all the parts have been prepped and primed. I riveted the trim tab arms E717/718 to the trim tab.
Next I riveted the bottom of the trim tab spar E607PP to the bottom of the trim tab skin. To perform this operation I was hoping to use my pneumatic rivet squeezer....unfortunately, the yoke would not allow me to use it. If I had a longeron yoke it would have worked.....but I really don't need one with the quick build fuselage so I wasn't going to spend $150 to buy one. This meant the rivets had to be bucked. This took time and I ended up getting a "smiley" that will have to be addressed with a little filler prior to painting. My suggestion is if you have or can borrow a longeron yoke......do it! Anyway I completed the riveting of the lower trim tab spar.
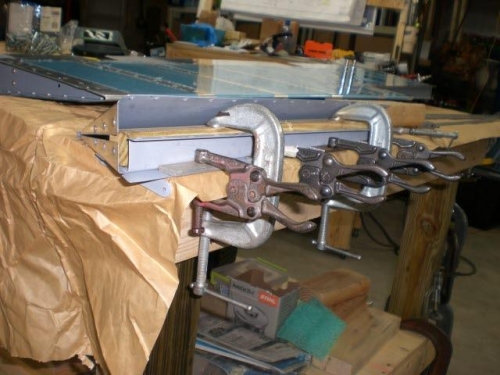
When I went to cleco the trim tab hinge on the upper skin and spar I found the skin holes to be misaligned with the spar holes by about 1/16 of an inch. This was too much to "pull" the holes into alignment so I clamped the spar and trim tab to the table and "adjusted" the spar till the holes matched up and could be attached without twisting the trim skin (see photo #1).
Next was trimming the trim tab hinge to match the contour of the end of the trim tab. I clecod the hinge on the trim tab spar and skin. Then I riveted the three.......what a breeze since I was able to use the pneumatic squeezer!!! IF YOU BUY ANY TOOL THAT MAY BE OPTIONAL....THE PNEUMATIC SQUEEZER IS A MUST! (my opinion....which I am the worlds leading expert on!)
With the trim tab complete, now it was time to get the hinge located on the trailing edge of the elevator, so it was measuring, using cleco clamps and getting everything positioned correctly. After many measurements and straight edge sightings.....everything was in place. I used the holes in the elevator trim spar to drill the holes in the hinge. Next was deburring and then setting the rivets in the hinge, once again made easy with the pneu sque
Re-aligning rivet holes in upper trim skin
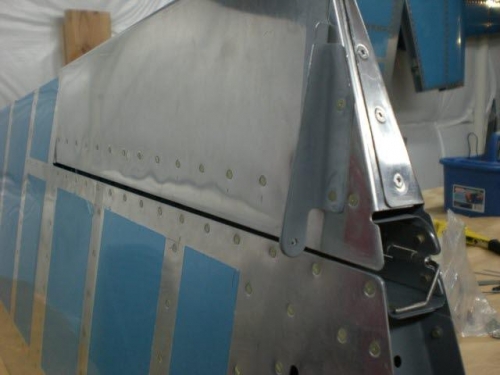
Trim tab attached(note hinge pin in bottom right of photo