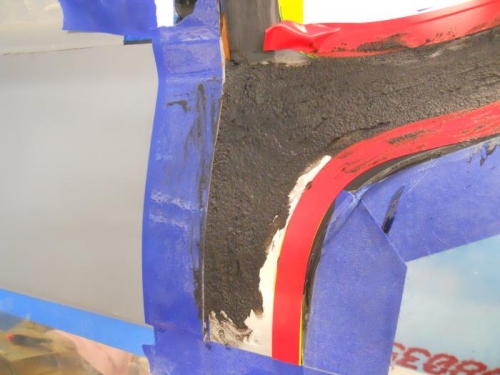
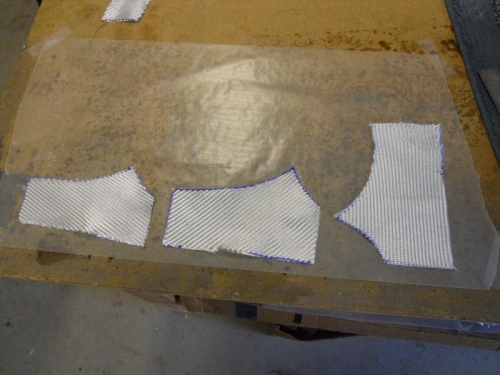
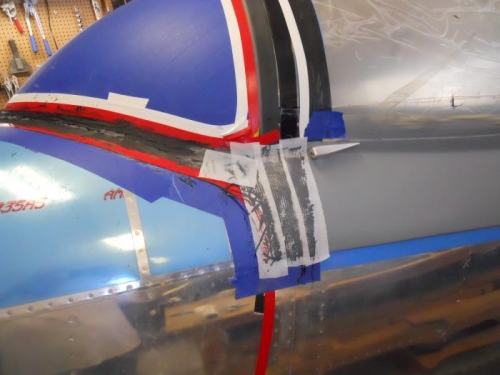
I wanted to get the lower sides of the fairing done—the area that slides over the canopy skirt. I made a template to use in cutting out the shapes. When I compared the template to each side, there was some difference, so I pulled the tape on the skin and ran it again so both sides are the same. It was only about a ¼” difference and I doubt if anyone would spot it unless they took pics of each side to compare. I built a dam out of modeling clay to fill the gap on the front edge of the canopy skirt. Mixed up some resin and flox (very dry) and filled in the area just in front of the skirt. Smoothed and tapered it back best I could, probably will require a fair amount of sanding later. Repeat for the other side, except I mixed too much flox—was so dry, I couldn’t do much with it. Threw it out and mixed another batch—much better. I also used the excess to fill in around the fairing where I had sanded thru the glass to plexi. While all this was drying, I cut out 3 pieces of cloth (per my template) for each side. I cut them a bit smaller each time—plan was to taper the edge in front. Fast forward 4 hours. I sanded the resin/flox down some to take the humps out. Layed out the glass on wax paper. Mixed up a batch of resin and poured on the glass—wetted it out and applied over the previously sanded flox, overlapping onto the skirt about 1.5”. I’m not sure 3 layers will be enough, but it is a start.