
|

|
|
|
Steve & Nancy Riffe
|
Date: 2-24-2017
|
Number of Hours: 4.00
|
Manual Reference:
|
Brief Description: Data plate, landing lights, gap seal
|
|
I picked up my newly engraved data plate from the trophy shop today. I picked a spot on the left aft fuse and match drilled the plate to the skin, then drilled the holes up to #30. I masked off the area that will be covered by the plate, scuffed, cleaned with MEK and shot some primer. I also shot a coat of primer on the back side of the data plate. After the primer dried, I used some monel pop rivets to secure the plate to the fuse. With N numbers and a data plate, looks like I’m “all in” and will have to finish this plane for sure! I also managed to get the rubber gap seal installed on the right side today—yipee, but I forgot to take a picture. I started on the upper side at the aft most position and worked forward, around the leading edge and back. I saw some posts saying to start on the bottom, but I couldn’t make that work when it got to the aft fairing strip where it tucks under the flap fairing. Tomorrow, I’ll tackle the seal on the left side. After I finally got this done, I raised the tail up so the plane was almost level--at least close enough. From this attitude I adjusted the landing lights—picked a point about 10’ away on the hangar wall and set the beams there at the same height as the wing. This will probably need further adjustment, but should suffice for the first night time venture. After aiming the lights, I installed the light covers and then lowered the tail back down.
|
|
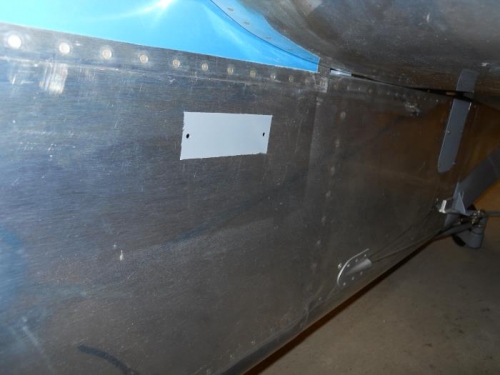
Prep for data plate
|
|
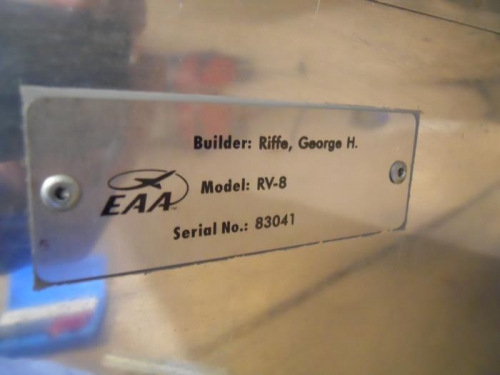
Data plate permanently attached
|
|
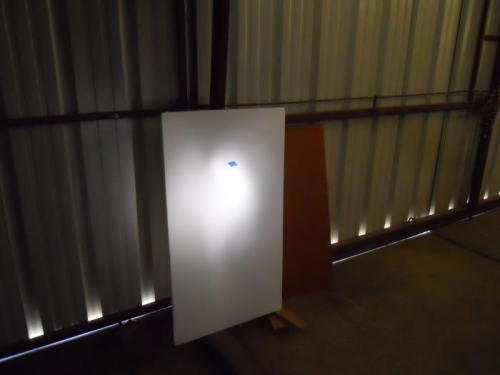
Aiming landing lights
|
|
|
|
|
|
|
|
|
Copyright © 2001-2024 Matronics. All Rights Reserved.
|