
|

|
|
|
Steve & Nancy Riffe
|
Date: 10-1-2016
|
Number of Hours: 1.00
|
Manual Reference:
|
Brief Description: Cowling foil-2
|
|
We stuck down the left side, then flipped the left pattern and used it to lay out the cut lines for the right side. BTW, for anyone following this log, I used the foil from Van’s catalog—it comes in 30” width. I ordered 5’ and had only 4 or 5 inches left over. Nancy and I peeled the backing paper and stuck down the right side, then worked on the wrinkles for a bit. Re-installed the lower cowl—looks like the foil is about right to hopefully keep some of the heat off of the fiberglass. Next, I re-installed the upper cowl. The horizontal pins fit so tight, that I couldn’t get them all the way in. What?? They had fit snug before, but no longer. I removed the upper cowl. The pins will slide in and out of both upper and lower cowling with very little resistance. It appears that in all the applications of resin while working on the cowls, that some of the excess got on the cowl edges thus making for a narrow (or none at all) paint gap. I ran a file along the edges and knocked off the obvious lumps and re-installed the upper cowl. Still a very tight fit—next time I have it off, I’ll work the edges down just a bit more. Next up is baggage door rebuild—got the parts a few days ago, so time to build a second and hopefully a better fitting door.
|
|
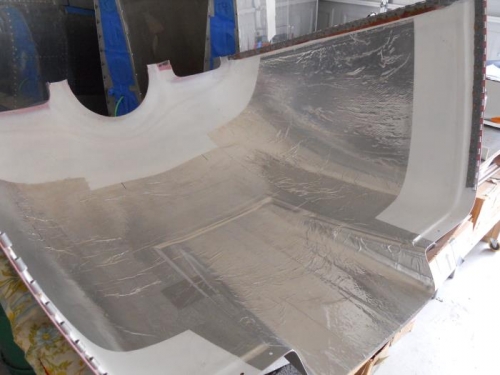
Foil applied to right side
|
|

Another foil pic
|
|

Cowl looks so much better in primer!
|
|
|
|
|
|
|
|
|
Copyright © 2001-2024 Matronics. All Rights Reserved.
|