
|

|
|
|
Steve & Nancy Riffe
|
Date: 2-26-2016
|
Number of Hours: 4.00
|
Manual Reference:
|
Brief Description: Baffles #4, #3 & side plates
|
|
Post 2. I torqued the 3 engine case bolts previously removed to install brackets to 96 in/lbs. per Lycoming. I removed baffle #3 again and made some more trim cuts, and riveted on the CB-1007B aft right support bracket. I squeezed one rivet and had to shoot the other—squeezer just wouldn’t reach. I then re-installed the baffle and secured with the mounting hardware—fits good enough for now—will need a small trim next time it’s removed. Next, I made the CB-706B spacer from some aluminum tubing. After several fit, mark, remove, trim and re-install sessions, I got the #4 baffle to fit. I match drilled thru the CB-707D aft center support bracket to tie the #3 and #4 baffles together at the rear of the engine. Then I added the #1 and #2 side baffle assemblies. Per the instructions, I clecoed together all parts of the #1 and #2 forward baffles and match drilled to #30, reamed a couple of holes to ¼” and drilled another hole up to #12. I installed the #2 baffle, marked for trim and removed. Trimmed it up and re-installed. Must be getting more bold with the trims—only had to do it 3 times on this baffle to get it to fit. I was about the rivet the support bracket when I suddenly remembered the filter air box for this side. I got out the drawings---geez! These are horrible—make the baffle instructions look really good. I also think I may be missing some parts that make up the FAB. Done for today.
|
|
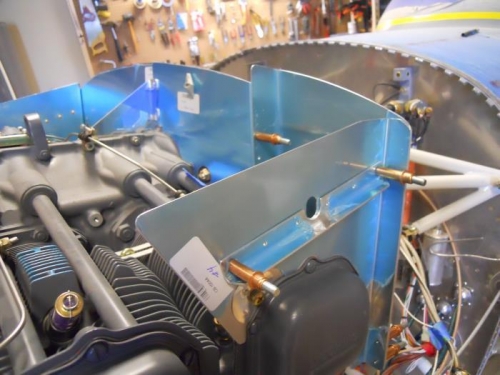
#4 & #3 baffles in place
|
|

Added side plates
|
|
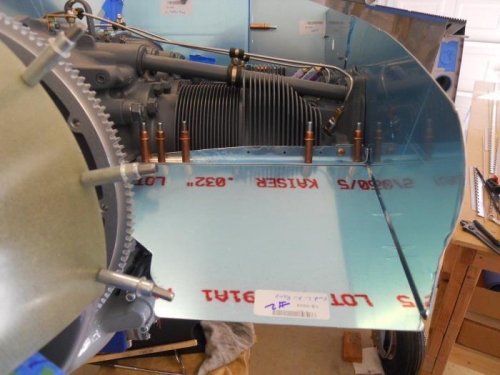
#2 baffle--stopped here to study FAB plans
|
|
|
|
|
|
|
|
|
Copyright © 2001-2024 Matronics. All Rights Reserved.
|