
|

|
|
|
Project Blue Angels SeaRey
|
Date: 10-5-2013
|
Number of Hours: 6.00
|
Manual Reference: None
|
Brief Description: Building out the temporary panel
|
|
To fulfill my panel design, I wanted the Dynon radio and intercom to be side-by-side horizontally under the center GPS… the only trouble is, the faceplates made them hang over the panel plate by ¼”. Grinder to the rescue! I couldn’t reduce the size of the radio, because there is very little overhang from the module itself, and faceplate won’t detach anyway. However, there was significant overhang with the intercom, and that faceplate was easily removable, so I grinded that ¼” off the one side that would sit up against the radio. I did this all by hand with an angle grinder, without it being clamped to a bench or anything, so I was dependent on my own artistic skills to cut it straight. I’m really happy with how it turned out… it could have easily been a disaster. Don’t try that at home, kids.
As previously mentioned, I’m installing everything in a temporary panel, to make sure I’m happy with the layout and make any mistakes now. Well, I thought I wanted my two panel fuses to be one on top of the other, so I drilled both holes, installed one, then realized that it wouldn’t fit like that without the fuse and its number identification being sideways. No problem, I drilled a hole beside the other and installed it there, it’s just as well.
|
|
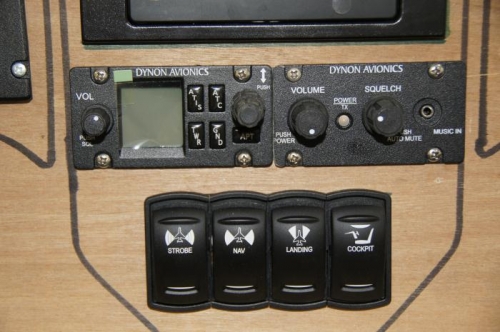
The intercom faceplate trimmed to fit horizontal with the radio
|
|
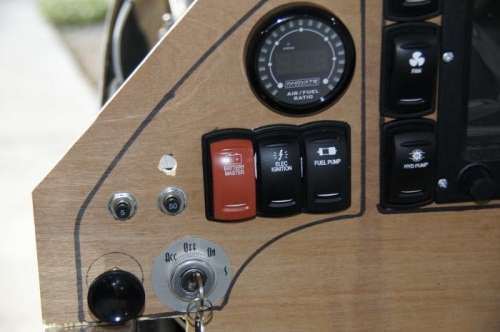
The whole reason for the temporary panel: make mistakes now
|
|
This fuse wouldn't fit on top of the other
|
|
|
|
|
|
|
|
|
Copyright © 2001-2024 Matronics. All Rights Reserved.
|