
|

|
|
|
Scott's Aircraft Build Logs
|
Date: 10-6-2012
|
Number of Hours: 4.00
|
Manual Reference:
|
Brief Description: Wing conduit and flight controls
|
|
Continued the wing conduit saga today. Yesterday I found an old 11/16" drill bit in a salvage yard. Even though it wasn't the sharpest bit I have ever seen, I thought it would work drilling through light aluminum. It worked perfectly, too bad I needed a 3/4" hole. I don't know what I was thinking. I thought about using my dremel tool, but it won't reach. Now I have two choices, go back to the salvage yard and look for another bit or order an extension. I am going to check extension prices, you never know when you might need an extension.
To continue work I started on the push tubes for the ailerons. One of the original tubes had a defect in it, small but enough that I would not trust it under any G loading. I ordered another one and it showed up today. I cut it to size and prepped the two good tubes for priming. They are almost six feet long, so the priming technique is to tape one end and pour the primer in and swirl it around. That is job for tomorrow morning.
The push tubes are connected to the airlerons via a bell crank. The bell crank bolts to attaching points inside the wings and they ride on bronze bushings. The bushings were not to size for the AN4-32 bolts, so I needed to drill them out. You can see the bushing in image one, and the first bushing in the bell crank with the bolt inserted in image two. Ahhh, the second bushing. A little too much pressure and it cracked. You can see the crack in the third image. Dead center. I guess I will be getting another one of those.
|
|
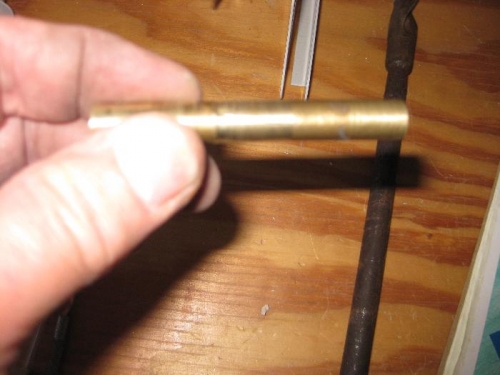
Bronze bushing (1 of 2)
|
|
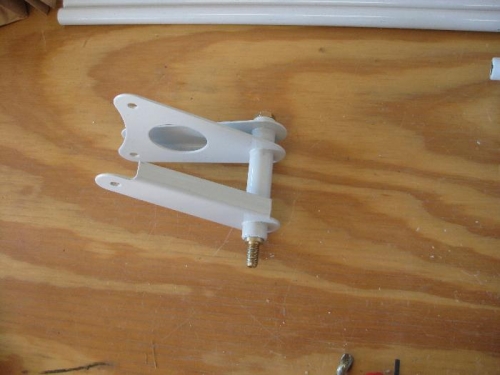
Bushing in bell crank
|
|
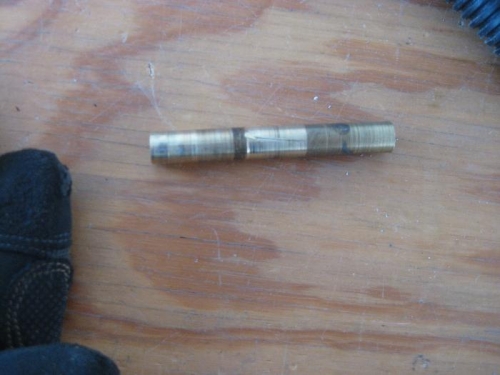
Cranked bushing
|
|
|
|
|
|
|
|
|
Copyright © 2001-2024 Matronics. All Rights Reserved.
|