Today I attempted to get the flap motor and mechanism completed. The first step was to complete the process of mounting the flap motor inside the flap actuator housing. I should have taken pictures as I went through the process, but I didn't. There is a flap plate and flap angle that provide support for the flap motor. I riveted those into place, which required riveting the plate then mounting the flap motor with the angle inside the housing. After clamping everything in place I drill the housing and the flap angle. Of course, everything came back apart to allow deburring and preparation and finally riveting. I will take a photo of the finished work tomorrow.
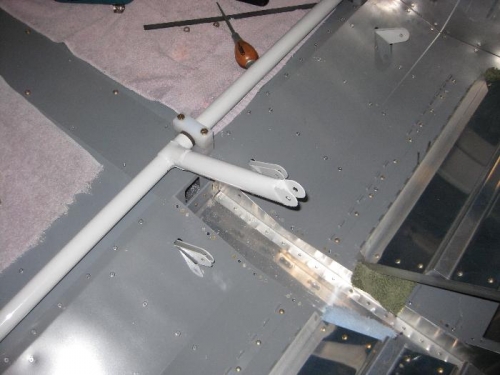
The second project was to drill the center flap bearing flock to the fuselage. This seemed easy; but after cutting it to the correct size and drilling the bolt holes, it became a process of leaning over the fuselage wall to get it in place. I would like to say it was a quick process, it wasn't. I believe I removed and installed the flap actuator a half a dozen times. Install the block, mark the centerlines. Remove the block and drill holes in the fusealge; remove the acutator and blocks and check alignment. Reinstall everything and drill the hole up a size, repeat. At the end I am happy with the block alignment and the edige distances of the bolt holes. I did not get the nutplates installed, that is for tomorrow. As I can not paint in my hanger (lease restriction) I had to collect up all the parts that needed paint and head for home. There I prepped, primed and painted.