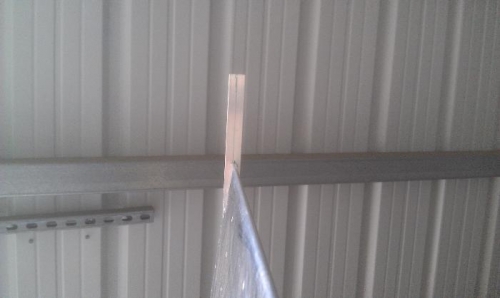
I only had an hour and a half to get work done, so I selected two tasks. When I rigged the ailerons last time I was not impressed with my alignment tool that I had made. A few weeks ago I made new tools for each wing. This tool is really nothing more than a straight edge that attaches to the edge of the wing using the tooling holes in the outside rib. A line drawn on the center line of of the tooling holes should line up with the trailing edge of the aileron.
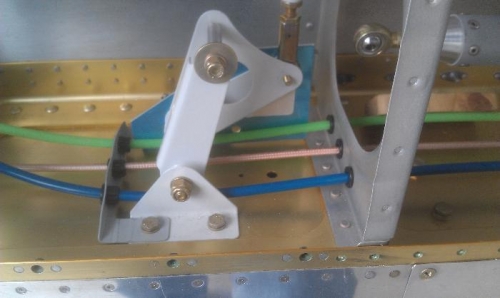
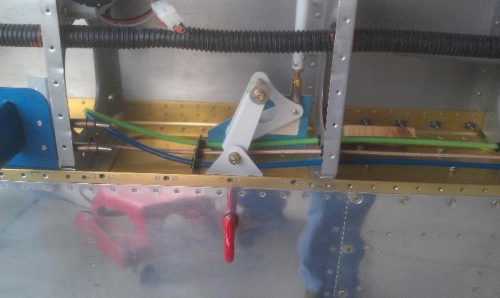
To check / adjust for neutral aileron you use a small sheet metal tool supplied by Vans that attaches to the top of the bell crank. This holds the bell crank in the neutral position. By adjusting the aileron push tube you can move the aileron into the neutral positio. This is indicated by aligning the aileron trailing edge with the alignment tool center line. I am not sure if I described this process well, maybe the images will help. In image one you can see the Vans tool attached to the top of the bell crank. If you are really observant you can see the tool is resting on the edge of the rib flange. I did not notice that until adjusting the aileron and taking the picture. That meant back to adjusting the push tube again. Image 2 shows the end results. The photo was not taken straight down the aileron, so it looks like the aileron is slightly below the center line. It is not. After checking everything one more time I tightened the jam nuts and applied a torque stripe for monitoring.
In my remaining minutes I tapped the hole for the wing tiedown. The tiedown structure is already inside the wing, I needed to tap the hole to the correct threads. Not difficult, just a slow process.